Sunday, December 29, 2013

Homemade Vanilla Extract--It's Easy, I Swear!

Recipe: Homemade Vanilla Extract
Source: Beanilla
Time: 5 minutes, 6-8 weeks of wait time 
Ease: 1
Taste: 10
Leftover Value: 10--It just gets better as time goes on!
Down the Drain or Keep it in the Strainer: Keep it in the Strainer!

If you had told me three years ago that I would love baking so much that I would scour the internet for ingredients not sold in the typical supermarket--I would have argued the ridiculousness of such a notion.  Yet here I am, ordering things like lavender and vanilla beans for recipes that call for such rarities. 

IMG_6315


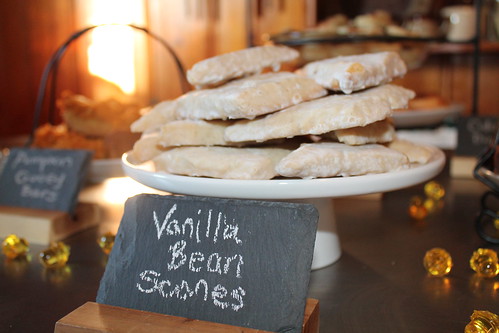
If you have never used a real live vanilla bean in a recipe, it is well worth the cost and wait of ordering online.  The first time I purchased vanilla beans online was to make Pioneer Woman's Petite Vanilla Bean Scones.  Instantly, I learned that there is no substitute for the beauty and wonder that is a vanilla bean.

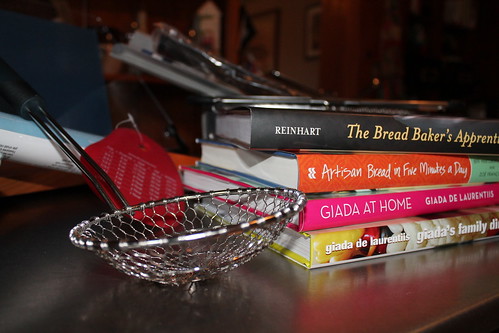
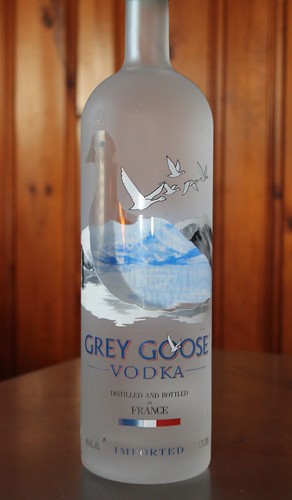
I got the idea to make vanilla extract after I received this as a gift:

IMG_6225

While it was an extremely thoughtful gift, at the time, Hubby and I could probably count on one hand how many mixed drinks we'd ever tasted.  We've explored a little since then, but again, only a little.

The picture doesn't do the size of the bottle justice, so to prove that I had a lot of vodka on my hands:  


IMG_6226

I had read on Beanilla.com that vanilla extract involved vodka, and after contemplating how many White Russians (Hubby's drink of choice) that we would have to make to use the entire bottle, I decided I'd use it for vanilla extract.

My goal was to make it for Christmas gifts, so I knew that even with the massive amount I had on hand I would still need a little more.

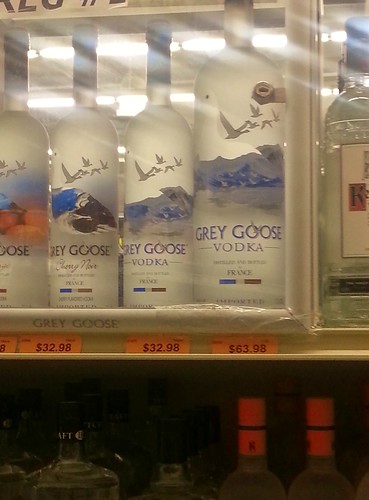
That's when I realized just how expensive my 1.75 liter bottle of Grey Goose went for:

20131016_202051

And how much the cheapest bottle of vodka in the store went for:

20131016_202131

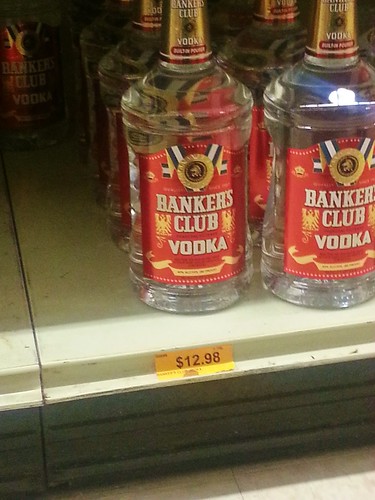
That's not totally true.  The Canal's brand was cheaper, but also had a lower alcohol percent, so I went for one step above that.  I also decided to make only a few bottles with the Grey Goose, all things considered.

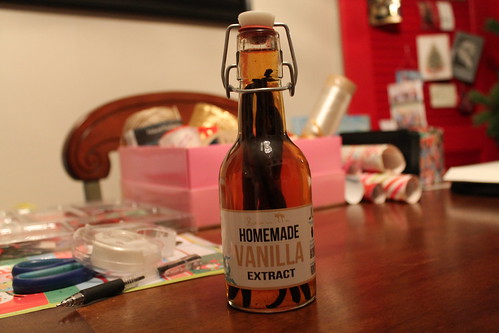
If you choose to do this at home, you do not need to order the "kit" from Beanilla.  I only did because I was making twelve.  If you visit the website, you'll notice that they have updated the packaging on the bottles compared to mine pictured below.  They've also raised the prices.  When I bought mine, the deal was $7.99 a bottle when you purchase twelve bottles or $9.99 for one.  Now it is $11.99 for one and $9.99 if you purchase twelve.  Unless you are making the extract in bulk or for gifts, it would be more cost effective to just order vanilla beans and buy your bottles somewhere else.  

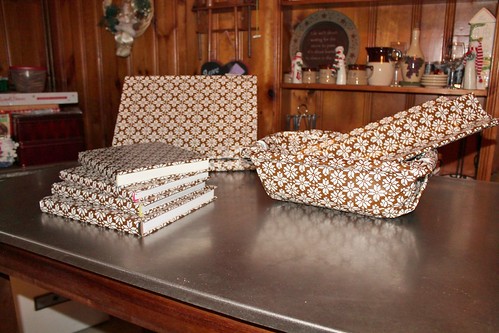
I will admit, I was a little giddy when my bottles and beans arrived in the mail.

IMG_6241

I've always found homemade gifts to be the most meaningful and I knew from the start that I wanted to make this for some of the special women in my life who I knew would not only love the gesture, but also use it up.

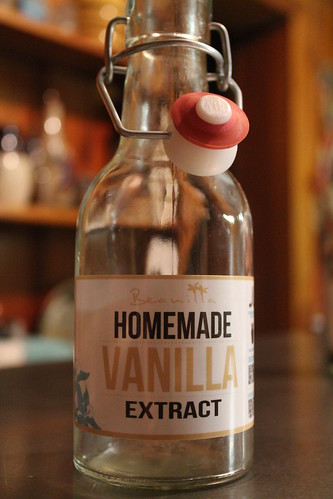
It couldn't be simpler, but just in case, they put the instructions right on the bottle.

IMG_6242

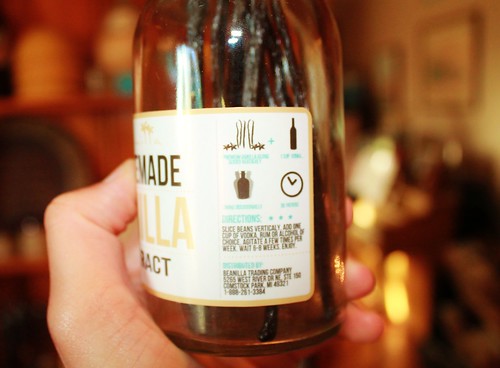
For an 8 oz bottle, you need five vanilla beans and one cup of vodka.

IMG_6320

Each bottle was packed with seven beans.  Knowing this, I had planned out a few uses for the extras in my holiday baking.

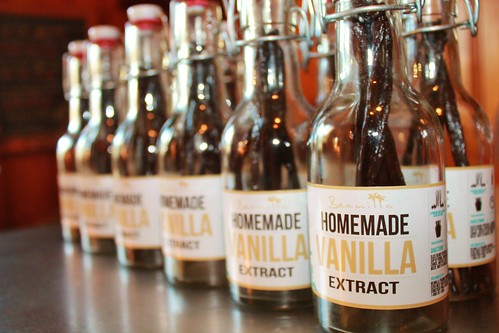
I love these bottles.

I really, really do.

Sorry.  It's the little things that excite me.

IMG_6321

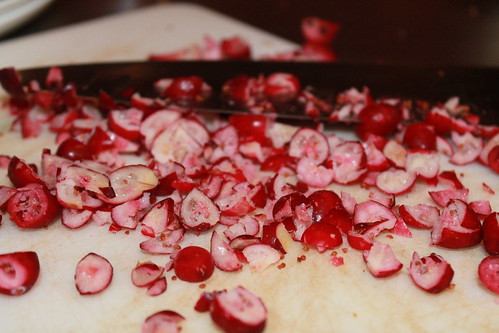
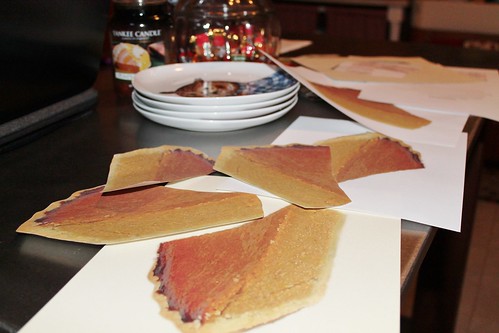
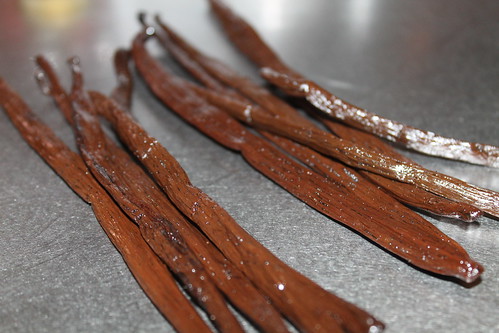
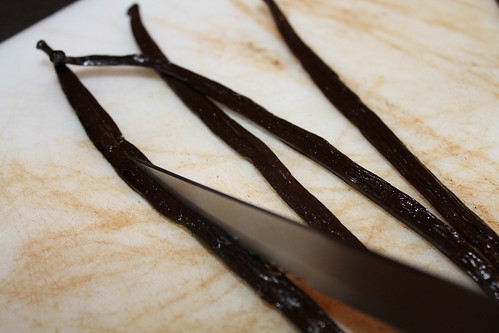
The first step is to slice the five vanilla beans down the center.*

*Note: Yes, I know there are only four beans pictured here. I promise, I used five.

IMG_6322

Shove the beans into the bottle.  The recipe on Beanilla says that you can cut them up into tootsie roll sized pieces, but that seemed like it would be a drag to deal with later, so I decided against it.

IMG_6325

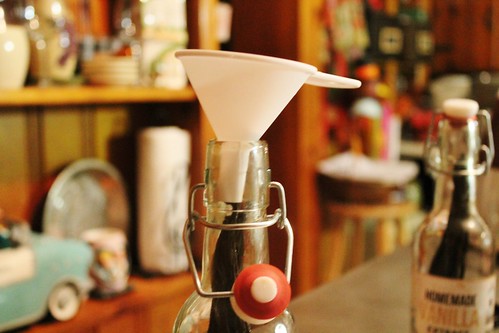
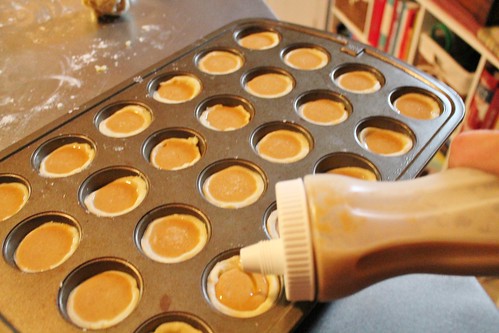
A funnel is of extreme importance for getting the vodka into the bottle without making a mess....a very expensive and smelly mess.

IMG_6326

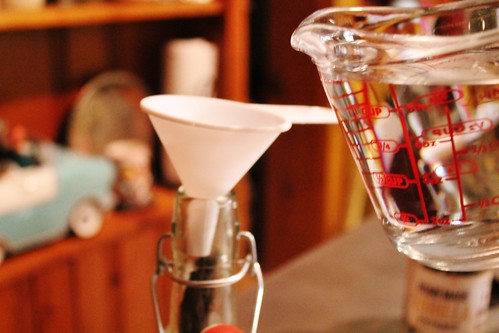
Pour one cup of vodka into the bottle.  Considering that the bottle is 8 oz, there is no real need to use a measuring cup rather than just pouring straight from the bottle.  However, I happen to have issues with needing to see things measured out accurately, therefore the measuring cup was used.

IMG_6327

Yet even with the measuring cup, I occasionally had to add more.  The entire bean should be submerged in liquid.  This is important to remind those you are gifting.  The beans can stay in for as long as you want, however, once the liquid level goes below the beans they should be removed.

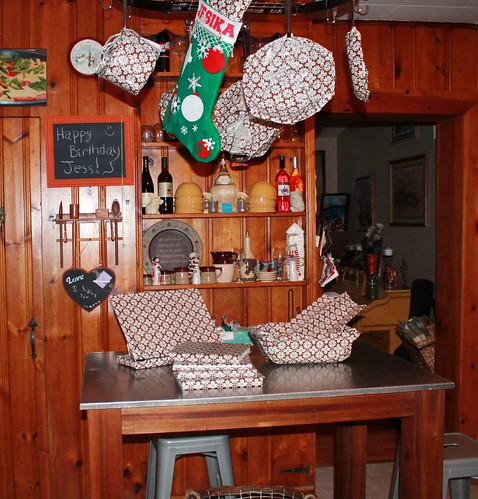
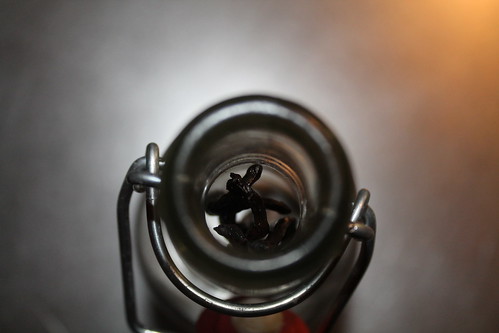
Every few days, give the bottles a good shake.  This is what mine looked like after about two weeks:

IMG_6334

I'm always excited about giving gifts, but I think I was most excited about this gift.

IMG_6934

There is no comparison between pure vanilla extract and imitation.  Pure always wins.  However, if you're thinking it's much easier to just pick up a bottle of McCormick's Pure Vanilla Extract, keep in mind that what you pay for 2 oz of that stuff is around what it will cost to make 8 oz of your own.

Make it yourself.  Trust me.  You'll thank me.  And anyone you make it for will thank you, too.

IMG_6942


Saturday, December 28, 2013

My Kitchen Christmas

I started a post on my other blog and was planning to write about my Christmas gifts there, but the post ended up going a totally different way than I had planned.

I love when that happens.  

Sometimes.

Instead of posting a recipe, which has been long overdue, I'm going to tell you about my Kitchen Christmas*.

*Translation: All the fun gadgets and gizmos I got for the kitchen!

Hubby and I started celebrating together on Christmas Eve's Eve a few years ago.  All during our dating years and our early newlywed years we waited until Christmas Day to give each other our gifts.  Then we realized, "Hey! We're in charge here!  Since we already get gifts on Christmas Eve (my family) and Christmas Day (his family), we might as well start the excitement early on Christmas Eve Eve".  

Hubby was out of bed early Christmas Eve Eve morning, which is not too unusual since neither of us can ever sleep in too late anymore.  Instinct told me he was heading to the gym, but when the sound of drilling woke me up around 7:00 am, I decided he had not gone to the gym.  (It was either that or we had prowlers).  I could only assume Hubby was putting together a gift for me, but I had no more of an idea what it was with the sound of drilling than I had without it.  Though I really wanted to tear out of bed, race downstairs, and catch him in the middle of whatever he was doing, I did my best to occupy myself upstairs until the sound of drilling stopped and I heard Hubby flip on Christmas music in the living room.

The doorway to my kitchen was wrapped:

IMG_6994

And still I had no idea what to expect beyond the wrapping paper.

IMG_6998

At this point, I was starting to put it together, and was almost sure, but not willing to take a guess on what lay underneath the ceiling to table wrapping.

IMG_7000

I am forever complaining about several things regarding my kitchen, and space is certainly one of them.  Not only did Hubby get me a place to hang extra pots and pans I have accumulated, he also bought me some more that I had been wanting.

IMG_7003

Now for the specifics.  Hubby is extremely good at sifting through reviews and finding the product that is highly rated in customer satisfaction and quality.  My new pots and pans are proof of this. He was a little more excited than me about the brand he had purchased.  I explained that I would become excited as I began to use them and realized their awesomeness.  I then explained I was still in shock over my gift and considering that I had just rolled out of bed he should have been happy I was able to even speak let alone express emotion so early in the day.

I know, I have issues.  He knew it before he married me.  Of that I am certain.

IMG_7076

While shopping in Williams and Sonoma a few months ago, we came across these awesome loaf pans: 


Alright, they weren't actually these pans.  While I do love Williams and Sonoma, they want your first born for most items in their store.  Hubby found both on Amazon.com.  The silver is an Italian loaf pan and can be found here:  Italian loaf pan and the black is a French baguette pan and can be found here:  French baguette pan.

Hubby bought me four cookbooks:

IMG_7004

Don't you love how he wrapped them?

Two of the books are specifically for baking breads. My house is going to smell awesome in the upcoming months.

IMG_7033

The other two books are Hubby's way to try and get me to give Giada a chance...we'll see about that.

I'm sure this next item you will be shocked to find out that I did not have up until this week.  It seems like a 'duh!' item for someone who is in the kitchen frequently.  While I had occasionally looked for one, nothing ever peaked my interest, so I never purchased one.


This is the most amazing recipe book holder in the world.  I'm sure I exaggerate, but please let me have my moment of ignorance.  I've used it only once so far, but can no longer imagine my world without it.  The best part, by far, is the splatter shield.  While of course, those splatters and stuck together pages in cookbooks lets others know which recipes and books are most loved, they also make for an eventual wear and tear down of these prized books.

For the link click here.   

Finally, but in truth not final for there are several things I've left out to tell of another time, is my waffle maker.  My sister-in-law got a waffle maker from my parents and when I saw hers I knew I needed one and instantly resolved to buy the waffle maker on my Amazon.com wishlist with my Christmas money.  

Lucky for me, my secret Santa in my husband's family bought it for me.  I made waffles yesterday morning and was overly pleased.  One batch made five Belgian waffles.  Hubby and I both had one for breakfast.  I froze two and put the other in the fridge.  

It didn't make it to the afternoon.

I'm not at all ashamed about that either.

Of all the options out there, I knew I wanted a Belgian waffle maker and one that flipped like in the fancy restaurants.  (Okay, I'm being a bit dramatic by dropping the word 'fancy' here).

                                                               
Here's the link: Flip Belgian Waffle Maker

My kitchen was greatly blessed this Christmas.  My hope is that I can put to good use all the many kitchen gadgets and tools to be a blessing to others throughout the year whether it is through simply posting an awesome recipe, making a batch of cookies for a friend, or inviting someone over to share a meal.

May you and your kitchen be blessed this Christmas and in 2014 as well!


Friday, December 6, 2013

Thanksgiving Delights: Part Four, Cinnamon Rolls

Recipe: Cinnamon Rolls
Source: The Pioneer Woman
Time: 3 hours
Ease: 10
Taste: 10
Leftover Value: 10
Down the Drain or Keep it in the Strainer: Keep it in the Strainer!

I've saved the piece de resistance for last.

Every single time I make these, something seemingly terrible happens and I fear the worst.

Something like, I double the batch instead of halving it.  Or, I forget to let the buns rise before shoving them into the oven.

You do things like this too, right?  Please say you do.

But in the end, they always come out looking like this:

IMG_6661


and all my fears subside.

Before I carry on, I want to take this moment to mention the star of my Thanksgiving breakfast:

IMG_6640


Dear dear butter.  How could we exist without the goodness you add to cakes and pastries?

I'm sure my thighs could still exist, but my heart would have an empty butter shaped hole.

Alright, enough of the sentimental stuff.

These cinnamon buns start out friendly.  The first steps require combining a warm liquid mixture with yeast.  Then, mixing it all together with flour.

A lot of flour.

Hence why I desired to cut the recipe in half a few years ago to no avail.

The dough sits for an hour.  I spend this hour trying to throw together one of my easier Thanksgiving breakfast recipes.  This year I spent this time making the Mini Cherry Pecan Pie 'dough'.

IMG_6657


I always use this pot and I'm always annoyed when after an hour is up I realize I meant to use my larger pot.

The moral of this story is: use a large pot.  And of course, don't be like me.

After the hour, baking powder, baking soda, and salt are sprinkled on top of the mixture.  They are then mixed into the dough along with another cup of flour.*

*Note: You will more than likely need to add even more flour.  I always knead the dough and then think, "Gee, this seems a little moist but I think it will work" and then I'm filled with regret later.

Because the step that follows is going to make your cinnamon rolls even more moist, gooey, and messy.  It's what takes this recipe from fun and friendly to painful agony.

Okay, I'm a little dramatic.  It isn't quite that bad.

IMG_6658


What you're looking at, dear friends, is what I imagine the entryway of heaven must look like.  Golden and delicious.

Alright, I'm not sure about the delicious part, but a girl can dream, can't she?

Because in the recipe she says you can use even more butter for the filling, I use exactly how much the recipe states (because even that seems a bit excessive considering the looks of the above picture).  This is followed by covering the butter with cinnamon and sugar.  The dough is then rolled towards you into one long luscious log of liberty.*

*This makes sense, I promise.

Because I like to give you the cold hard truth here about the recipes I try out, I am going to tell you the mixture of issues I always have at this step.  First of all, my cinnamon rolls always end up oozing buttery pools mixed with cinnamon sugar by the end of the roll.  The next problem is the dough isn't firm.  This doesn't create the perfectly formed cinnamon buns you see in all the Pillsbury commercials.  Instead my buns look like Pillsbury blobs.

Yet, once I assemble my blobs into their pans, bake them, and ice them, they always end up looking like this:

IMG_6664

So for all the faults I have encountered in making these gorgeous globs of goodness, I suppose if they always come out tasting delicious, that's all that matters in the end.

Wednesday, December 4, 2013

Thanksgiving Delights: Part Three, Candied Bacon

Recipe: Candied Bacon
Time: Source states 15 minutes, it took me about 25 minutes
Ease: 1
Taste: 8
Leftover Value: No leftovers!
Down the Drain or Keep in the Strainer: Keep it in the Strainer*

*But only for special occasions!


How I have gone this far through life without hearing of candied bacon, I do not know.  

I've heard tell of chocolate bacon.  There is a billboard on the main highway near my home for a candy store about twenty minutes north.  A slab of chocolate bacon is pictured.  The same sign is about ten miles down the road.  I see it so often I can't help but feel that we are on a more than just acquaintances basis.

Yet, I am not sure how I feel about it.

I first heard of candied bacon on the blog: Lunchbox Blues

It looked like such a treat.  I knew I had to try it out.  Since it was candied, I assumed it would fit in perfectly with my dessert breakfast.

I quickly learned that while candied bacon is divine, there are two things you must know before attempting to make it:

1. This may seem obvious, but candied bacon is sweet.  If you are expecting regular bacon, you will not get regular bacon.  You have to prepare yourself for candied bacon.  

2. Making candied bacon can be extremely messy.  Use as much precaution necessary.  J.M.Hirsch, the blog's author, warns the cook that he/she must line a rimmed baking sheet with foil or clean up will be horrendous.  I followed his direction, and even then feared clean up would be a beast.

Despite the below picture, have no fear, the clean up was not as horrible as I feared.

IMG_6711

Candied bacon is as easy as pepper, brown sugar, and bacon.  Literally the simplest recipe on earth.  Sprinkle the bacon with pepper, if you want to add a little smoked paprika you can.  Then, put a cup of brown sugar in a Ziploc bag.  Toss the bacon strips in the sugar, then lay the bacon on a wire rack set over a rimmed baking sheet lined with tin foil.  If you spray everything with cooking spray that will ensure an even easier clean up.* 

*Note: I did not do this.  Don't be like me. 

Since it was Thanksgiving morning, and since my bacon took about 20 minutes to crisp instead of 10 as the recipe states, I didn't have time to clean up the scalding hot grease that sat in my pan.

This meant the above picture occurred over the course of the following four hours.  At first I thought my life was over and pictured myself throwing the entire thing away and having to reason going out and purchasing a new rimmed baking pan.  However, my husband, who I am pretty sure is the smartest living soul on earth, quickly calmed my fears by telling me to throw the pan into a hot oven for a few minutes.  

It worked perfectly and my pan was soon so clean no one would know the disgusting grease that had coated it only hours before.

20131128_095754
Our dessert breakfast table.  Yum!
Though it certainly looks like regular bacon, candied bacon is far from it.  My father was excited when I first gave him a piece, then instantly declared that you should never mess with a good thing like bacon.

I suppose we can't all be a fan.  If I had been in a real bacon mood, I might have been inclined to agree.

Everyone else seemed to like it a lot.  Again it was not what they expected.  So be sure to brace yourself for something different than bacon that is made up almost 100% of bacon.

I think I enjoyed it because I'm one of those people who likes to pour their syrup all over everything on their plate.  It simply adds more flavor to not only pancakes, but bacon and eggs as well.

It also adds some more flavor to my hips, but that's a sad story for another time.

Candied bacon reminded me of the bacon slices that have been sitting on my plate wading in a pool of maple syrup.  Sweet, crisp, and delicious.

IMG_6696

Another perk to making this candied bacon was that I learned making bacon in the oven is just as delicious as frying it in a pan.  I will certainly be giving that a try next time I make bacon sans brown sugar.

Tuesday, December 3, 2013

Thanksgiving Delights: Part Two, Cranberry Butter

Recipe: Cranberry Butter
Source: The Orange Strainer
Time: 15 minutes, plus time in refrigerator
Ease: 2
Taste: 10
Leftover Value: 10
Down the Drain or Keep in the Strainer: Keep it in the Strainer!

A local diner near my house serves bread with three types of butter: regular, garlic, and cranberry.  Butter and bread is classic.  Garlic butter is incredible.  Cranberry butter is an unexpected delight.

The first time I experienced this butter wonderland, I wanted to take back my dinner order and send for more bread and butter.

It was that amazing.

This cranberry butter is what made me choose to make Baked French Toast as part of my Thanksgiving breakfast.

As I started to make it, I feared that it wouldn't meet my expectations.  This is probably because I've never made anything with cranberries before.  Because of this, I decided to give a raw one a try.  The taste was so bitter, I instantly started shaking my hands and making whining noises like Will Ferrell did in Elf when he sprays Passion Fruit (perfume) Spray in his mouth.

Cranberries alone are terrible.

IMG_6625

Cranberries in butter are mind blowing.

I chose to make it the simple way (simple = less dishes to wash), however, if you want a more whipped butter, you can mix the ingredients in a stand mixer rather than the following way.  Just remember to lightly mix in the fruit.  You want there to still be some chunks of cranberries throughout.

Here's what you'll need:
1/2 cup of cranberries
1 cup (2 sticks) butter, softened
2 T powdered sugar
2 T honey
Zest of one orange

Start by giving the cranberries a good chop.  I had frozen mine so it made them super easy to chop up.

IMG_6623

Put your softened butter into a medium sized bowl.

IMG_6627

Sprinkle in the powdered sugar.

IMG_6629

Pour the honey on top.

IMG_6632

Give it all a good mix at this point.

Then, zest the orange over top of the butter mixture.

IMG_6634

Toss in the cranberries, but not any liquids that may have gathered at the bottom of your measuring cup.

IMG_6635

Lightly mash the berries into the butter mixture.

IMG_6706

Refrigerate for a few hours.  Serve with pancakes, french toast, baked french toast, fresh bread, muffins, or any delicious carb of your choosing.

IMG_6709

If you cross your eyes, this picture is totally in focus.  I had to add it to show that each butter knife's worth is woven with bits of cranberry which have been transformed from passion fruit spray bitter to a pleasantly sweet surprise.  

Mixed with maple syrup, it is positively divine.

Because I think you're cute, I've written the recipe out below:

Cranberry Butter

Ingredients:
1/2 cup of cranberries
1 cup (2 sticks) butter, softened
2 T powdered sugar
2 T honey
Zest of one orange

Steps:

Chop up the cranberries.  
Place softened butter in the bowl.  
Add the powdered sugar and honey.  Mix well with a spoon.  
Zest one orange on top of the butter mixture.  
Add the berries.  Mix lightly.  
Refrigerate for a few hours.

Enjoy!

Sunday, December 1, 2013

Thanksgiving Delights: Part One

I've been in charge of Thanksgiving breakfast since I've been married.  It is one of my favorite things about Thanksgiving other than the turkey, the stuffing, the mashed potatoes, the after dinner dessert, the family time...okay, let me rephrase, it's my favorite part of Thanksgiving morning.

Other than the parade.

Usually I send out a family email blast to let everyone know breakfast is still on and that they don't need to bring anything because I'm crazy enough to attempt to make 12 completely different desserts within the two days before Thanksgiving.

In case you're wondering about the dessert part, this post should explain everything: Thanksgiving breakfast

This year I found inspiration in summer party invitations I saw on clearance at Target.  The invitation was a two-tone ice pop (with stick and all) and on the back was where the details of the party were to be written.  I loved this, but couldn't see using ice pops for a Thanksgiving dessert breakfast.

After a little thought, the pumpkin pie invitation was born:

IMG_6507

I always try to switch up the menu a little bit.  Last year was the year of the mini desserts.  Mini desserts are great because guests are always afraid to be the person who takes the first slice of pie or cake.

The tough item to make mini was pumpkin pies.  Pumpkin pie should take only about 30 minutes (at most) of prep time.  Shorter even if you are using canned pumpkin and a pre-made crust.  But me, I'm married to my better than pumpkin pie recipe which uses fresh butternut squash instead of canned pumpkin.  Making this into mini pumpkin pies took collectively about 3 hours of my time.

It was so worth it.

20131126_152128

What helped the process move along smoothly was this pancake pen I bought ahead of time:

IMG_6606

I am absolutely in love with this item.  The pumpkin pie mixture for this recipe is extremely liquefied.  Knowing this before hand, I figured a pancake pen would make life so much easier.

Boy am I happy when I'm right.

IMG_6608

Some of the other items on my menu were:

IMG_6680

Just like, in fact better than, Starbucks petite vanilla bean scones.  While scones are typically a little more on the dry side, the icing on these trap the moisture in and each bite is moist with vanilla bean deliciousness.

My sister-in-law, Kristina, helped me pick this one out:

IMG_6694

Baked French Toast.  Oh-my-goodness.  While I know this isn't really a dessert, I wanted to have a somewhat breakfast item to offer.

That's what I said to my sister-in-law as we discussed and decided on Baked French Toast to fulfill that desire of mine.  The truth was I wanted to make cranberry butter, and I figured this would be the perfect thing to put it on.

It was.  It most certainly was.

Look for the recipe for cranberry butter in one of the upcoming posts.

I love cheesecake brownies, it is my go to treat at Starbucks these days.  I thought I would concoct my own cheesecake pumpkin bar.  As Thanksgiving day got closer, and my body got run down with an unwelcome seasonal cold, I hadn't yet settled on what I would be doing to make my cheesecake pumpkin bar come to life.  That's when a coworker told me about these:

IMG_6678

Please don't judge me when I say this, Paula Deen should be sainted.

There.  I said it, and I meant it.

I love her almost as much as I love the butter she uses in all of her recipes.

These Pumpkin Gooey Bars were just as good as the pumpkin cheesecake bars I was dreaming up.  The cake crust on the bottom gave a great balance to the sweet creamy pumpkin mixture on top.  They were yummy cold or even warmed up for about 15 seconds in the microwave.  Either way, top it with a little cool whip and you've got pumpkin heaven in bar form.

About a week before Thanksgiving, I realized I had no chocolate on my breakfast menu.

No chocolate.  No a lick, drib drab, ounce, drip drop, or even an iota of chocolate on the menu.

For shame, I know.

I looked through my clipped recipes that I have yet to make and found these glorious masterpieces:

IMG_6684

Smores brownies.  Oh yes.

I've made another version of smores brownies before and was highly disappointed.  While they were decent brownies, they were hardly worthy of being considered smores brownies.

These most certainly were.  They were the one item on my breakfast table that I didn't have any left overs of.  Now that has to say something about them!

Go here for the recipe: Inside Out Smores Brownies

It seems this was the year of last minute additions.  I am typically not into fruit desserts.  Cherries, however, I have a soft spot for.  When I saw these mini cherry pecan pies in an ad for Lucky Leaf Cherry Pie Filling, I knew I had to make them....if I could find the time.

IMG_6672

They were mini, which made them even more necessary to add to my breakfast table.  They took a little longer to bake than the recipe said, otherwise they were perfect.

For the recipe go here: Cherry Pecan Pies

I've saved three recipes to give you a blow by blow, step by step, look at.  Up first will be Cranberry Butter.  
You won't want to miss it.