Showing posts with label dessert. Show all posts

Monday, January 5, 2015

Recipe #58 and #59: Pots and Peaches

Recipe: Perfect Pot Roast
Time: 3 hrs 30 min
Ease: 3
Taste: 10
Leftover Value: No leftovers!
Down the Drain or Keep in the Strainer: Keep it in the Strainer!

I blogged about this recipe three years ago. This was the year before I started the Orange Strainer. By reading this post, you can tell what a novice cook I was, allowing a pot roast to get the better of me.

Despite what you will read in my previous post, this is a ridiculously simple recipe with flavor that will amaze all who join your dinner table.

IMG_1736

I'm on a mission to discover easy recipes that taste like they have been slaved over for hours.

That's the dream, isn't it?

IMG_1738

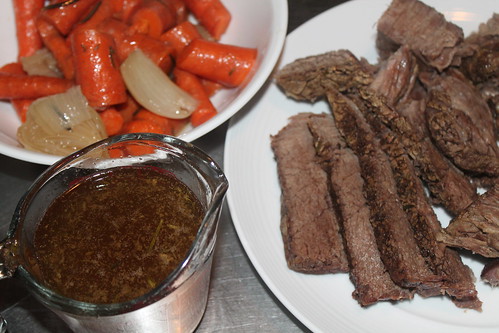
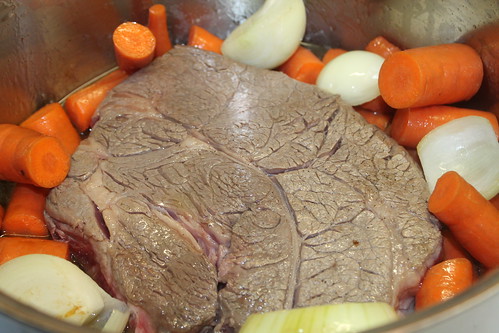
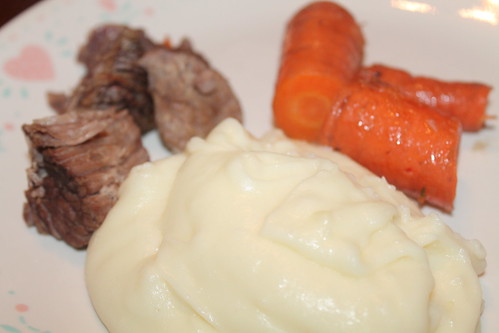
Side veggies cook right in the pot with the roast, the juices create a delightful gravy, and the only additional item you'll need to make is buttery, milky mashed potatoes.

IMG_1740

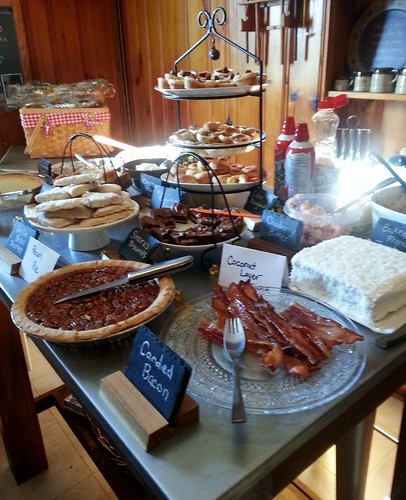
I served this for two of my brothers and my sister-in-law the night before Christmas Eve...you know, Christmas Eve Eve. I used a 3-lb roast because my grocery store options were that or a monstrous sized roast.*

*A word to the wise, monstrous is better than measly. This shrimpy 3-lb roast was barely enough for us all. In other words, we had to eat politely.

Unacceptable.

The meat is so moist and tender that you really don't need any gravy, but it's nice to know it is there.

Recipe: Peach Crisp with Maple Cream Sauce
Time: 1 hr 20 min (includes cream sauce chill time)
Ease: 3
Taste: 7
Leftover Value: 3
Down the Drain or Keep in the Strainer: Keep it in the Strainer!

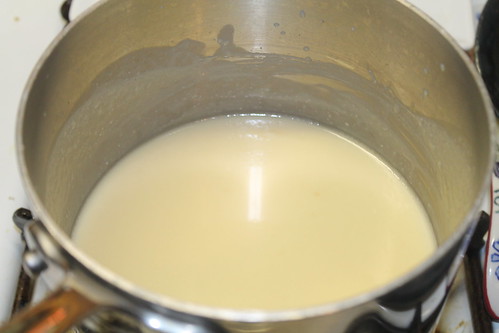
On her website, PW gives a cheat to making the cream sauce quickly. In the book, however, she says to chill the cream sauce for at least an hour. 

Because I'm a rule follower...this is what I did.

IMG_1737

However, because another part of me is a little rebellious and stubborn, I did not use fresh peaches for this recipe.

I also did not use common sense in deciding what to use instead of fresh peaches.

For some reason, my mind immediately went to canned peaches.

I was smart enough to know I would need to drain the liquid from the can considering that PW used fresh peaches that she peeled and sliced.*

*Gosh, that sounds like a lot of work.

In all honesty, I wasn't trying to avoid peeling and slicing 6-7 peaches. It simply isn't the time of year for peaches. And while I planned ahead for time-of-year items at the beginning of this challenge with Katie's Roasted Corn Salad, I didn't when it came to peach crisp.

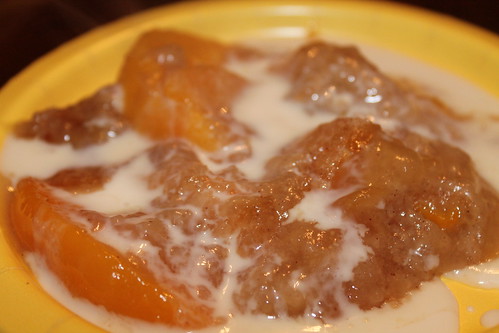
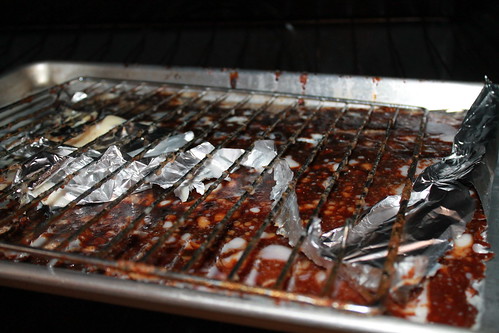
It wasn't until my peach crisp turned out looking like this, even after plenty of added baking time, that I realized, "Duh! I should have used frozen peaches!"

IMG_1750

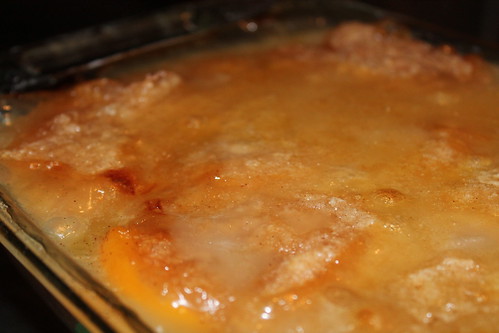
Even with the overabundance of liquid in this "crisp", the flavors all combined into this absolutely divine peach crisp soup.

A soup which I am pretty sure every one of us burnt our tongues on due to our over eagerness to eat it.

PW is right about the cream sauce. It is so delicious I could've drank it like a milkshake.

My thighs would have hated me for it, but my belly, mouth, and soul would have been happy.

IMG_1754

Wednesday, December 31, 2014

Recipe #56: Upside Down Pineapple Cake

Recipe: Pineapple Upside Down Cake
Time: 1 hour
Ease: 4
Taste: 7
Leftover Value: Issues led to no leftovers
Down the Drain or Keep in the Strainer: Keep in the Strainer

You may recall, fruit and cake don't normally equate in my world.

Regardless of this, and regardless of the fact that I never, ever would have made this cake had I not been in the middle of a recipe challenge forcing me to make every single recipe in The Pioneer Woman Cooks, I am learning with each additional dessert I make with fruit that fruit only makes desserts better.

Except with chocolate.  I'm still learning to accept including fruit with chocolate. 

Except chocolate covered strawberries.  They are kissed by God.

IMG_1701

Butter and brown sugar.

That is the story of this cake.

And an iron skillet.

It is pretty much essential to this recipe.

IMG_1706

Thank God PW doesn't try to reinvent the wheel by making you cut up your own pineapple.

That would have crushed my soul.

Canned pineapple rings make life so much simpler.

The batter is basic and can be mixed together in the same amount of time that it takes for the butter and brown sugar to melt together.

IMG_1708

Here is where my impatience yet again got the best of me.

I baked the cake in the oven for thirty minutes.

It seemed a little wobbly in the center, so I skipped the whole toothpick step and put it back in the oven for another ten minutes.*

*Note: PW says it should bake for 30-40 minutes.

After another ten minutes, I decided it had to be finished.  The toothpick was being rather difficult.  It would seem clean at some points and others appeared wet.  I reasoned to myself that it was the wetness of the fruit and that the cake must be finished.

Foolish, foolish girl.  I know.


IMG_1710

The problem with this cake is that once you commit to flipping it out of the pan it is irreversible.

In my defense it really, really looked finished.

It was golden brown to a point that I worried it would burn.

IMG_1711

Yet somehow, I should have saw the sign.

The sign that blared, "NOT FINISHED".

IMG_1712

Regardless of this slop, Hubby and I cut off a hunk of the edge and devoured the cake while it was still piping hot.

The cake had a sweet crispiness to the edge, and the inside was moist and airy.  I made sure to grab a huge slice of pineapple to pair with my piece, and I loved each and every bite.

I'm sure I could have attempted to save the remnants of the cake, but it was beyond the energy I was willing to expend on cake.

Especially after I saw what was left in my cast iron skillet.

IMG_1713

Thursday, November 13, 2014

Recipe #21: Red Velvet Cake

Recipe: Red Velvet Cake
Source: The Pioneer Woman Cooks*
Time: 1 hr 10 min
Ease: 4
Taste: 9
Leftover Value: 9
Down the Drain or Keep in the Strainer: Keep it in the Strainer!

*The recipe at this link is the same as the one in the book, only she makes it a sheet cake instead of a two layer cake.

This is the last recipe in The Pioneer Woman Cooks.  Though I love red velvet cake, this was my first time making this recipe for one reason alone: the recipe intimidated me.  For some reason, red velvet cake seemed to me a fried chicken type recipe--one that isn't worth the stress of making at home.  After making my very first red velvet cake, I am living proof that it isn't that bad.

IMG_0731


Except when you're in the thick of it with measurements.  Don't you love when each dry ingredient uses a different sized measuring cup?

Oh, no?  You don't?

Me either.

The recipe calls for cake flour, but don't you dare go out and buy a box of that overpriced nonsense.  In my Vanilla Cake Batter Pancakes recipe I tell the simple way to make your own cake flour in less than two minutes.

IMG_0736

Alright, confession time.

This was not red velvet cake, but rather, pink velvet cake.

Since the red dye isn't an element affecting the flavor of the cake, and since I only had .25 ounces on hand I refused to go out and purchase .75 more ounces simply to affect the color of my cake.

I did battle a little with whether or not this counted as an alteration to the recipe, but since I am also  the ultimate judge in the matter I ruled that it wasn't an alteration.

IMG_0741

One problem I faced, which I'm claiming as my fault, was that the cakes ended up sticking a little to the pan.  This is more than likely due to the fact that I didn't take the cakes out of the pans after the 20 minute cooling period.  I was juggling a few things as I made the cakes, and the cakes ended up sitting in their prospective pans for closer to an hour.

Causing this to happen when I attempted to dump the first cake out:

IMG_0744

Actually, it looked far worse and I may or may not have screamed my anger out to the floor of my kitchen.

Not one to be outsmarted by a silly pan, I pieced the broken parts of the cake back together and moved along as if nothing happened.

In the end, no one knew the difference.

IMG_0746

I have to confess, I hate making cakes.  I love eating them, but making them doesn't excite me.  Usually around the icing part is when I remember that I hate making cakes.  Perhaps because there is so much hype now for creating cakes that are pieces of artwork rather than items that are going to be demolished by chomping teeth and salivating lips.

Sorry, I calls it like it is.

IMG_0761

However, despite the flecks of pinkish red in the icing, I received a compliment on my icing job.

Shocking, I know.

As my sister-in-law, Kristina, ate her piece of cake, she commented on how she can never proportion icing correctly for a two-layer cake and marveled at how well I did.*

Then I told her that I often feel the same way too.  I'm thinking it's merely a matter of women's insecurities.

*The trick is to use a third of your icing.  Short of measuring everything out, eyeballing it is the best way to go.
\
IMG_0765

I had to include this picture of how beautifully my brother cut the cake.  I'd say he's got a future in cake slicing, wouldn't you?

IMG_0767

It took a little effort to adjust to Pink Velvet Cake, but we managed.  The cake was dense, making one of those slices a little difficult to finish in one sitting, but it was also moist throughout.  My favorite though was the cream cheese frosting.  It was, like most frosting, good enough to be eaten by the spoonful.

Cake?  Who said anything about cake.  I'm perfectly fine with my bowlful of cream cheese frosting.

Alright, that is a bit excessive.

Or is it?

IMG_0771

Wednesday, December 4, 2013

Thanksgiving Delights: Part Three, Candied Bacon

Recipe: Candied Bacon
Time: Source states 15 minutes, it took me about 25 minutes
Ease: 1
Taste: 8
Leftover Value: No leftovers!
Down the Drain or Keep in the Strainer: Keep it in the Strainer*

*But only for special occasions!


How I have gone this far through life without hearing of candied bacon, I do not know.  

I've heard tell of chocolate bacon.  There is a billboard on the main highway near my home for a candy store about twenty minutes north.  A slab of chocolate bacon is pictured.  The same sign is about ten miles down the road.  I see it so often I can't help but feel that we are on a more than just acquaintances basis.

Yet, I am not sure how I feel about it.

I first heard of candied bacon on the blog: Lunchbox Blues

It looked like such a treat.  I knew I had to try it out.  Since it was candied, I assumed it would fit in perfectly with my dessert breakfast.

I quickly learned that while candied bacon is divine, there are two things you must know before attempting to make it:

1. This may seem obvious, but candied bacon is sweet.  If you are expecting regular bacon, you will not get regular bacon.  You have to prepare yourself for candied bacon.  

2. Making candied bacon can be extremely messy.  Use as much precaution necessary.  J.M.Hirsch, the blog's author, warns the cook that he/she must line a rimmed baking sheet with foil or clean up will be horrendous.  I followed his direction, and even then feared clean up would be a beast.

Despite the below picture, have no fear, the clean up was not as horrible as I feared.

IMG_6711

Candied bacon is as easy as pepper, brown sugar, and bacon.  Literally the simplest recipe on earth.  Sprinkle the bacon with pepper, if you want to add a little smoked paprika you can.  Then, put a cup of brown sugar in a Ziploc bag.  Toss the bacon strips in the sugar, then lay the bacon on a wire rack set over a rimmed baking sheet lined with tin foil.  If you spray everything with cooking spray that will ensure an even easier clean up.* 

*Note: I did not do this.  Don't be like me. 

Since it was Thanksgiving morning, and since my bacon took about 20 minutes to crisp instead of 10 as the recipe states, I didn't have time to clean up the scalding hot grease that sat in my pan.

This meant the above picture occurred over the course of the following four hours.  At first I thought my life was over and pictured myself throwing the entire thing away and having to reason going out and purchasing a new rimmed baking pan.  However, my husband, who I am pretty sure is the smartest living soul on earth, quickly calmed my fears by telling me to throw the pan into a hot oven for a few minutes.  

It worked perfectly and my pan was soon so clean no one would know the disgusting grease that had coated it only hours before.

20131128_095754
Our dessert breakfast table.  Yum!
Though it certainly looks like regular bacon, candied bacon is far from it.  My father was excited when I first gave him a piece, then instantly declared that you should never mess with a good thing like bacon.

I suppose we can't all be a fan.  If I had been in a real bacon mood, I might have been inclined to agree.

Everyone else seemed to like it a lot.  Again it was not what they expected.  So be sure to brace yourself for something different than bacon that is made up almost 100% of bacon.

I think I enjoyed it because I'm one of those people who likes to pour their syrup all over everything on their plate.  It simply adds more flavor to not only pancakes, but bacon and eggs as well.

It also adds some more flavor to my hips, but that's a sad story for another time.

Candied bacon reminded me of the bacon slices that have been sitting on my plate wading in a pool of maple syrup.  Sweet, crisp, and delicious.

IMG_6696

Another perk to making this candied bacon was that I learned making bacon in the oven is just as delicious as frying it in a pan.  I will certainly be giving that a try next time I make bacon sans brown sugar.