Showing posts with label Thanksgiving. Show all posts

Monday, October 27, 2014

Recipe #7 and #8: Mashed Potatoes and Comfort Meatballs

Source: The Pioneer Woman Cooks
Time: 1 hr 50 min
Ease: 4
Taste: 7
Leftover Value:
Down the Drain or Keep in the Strainer: Keep it in the Strainer!

Source: The Pioneer Woman Cooks
Time: 1 hr 35 min
Ease: 4
Taste: 10
Leftover Value: No leftovers!
Down the Drain or Keep in the Strainer: Keep it in the Strainer!

IMG_0507

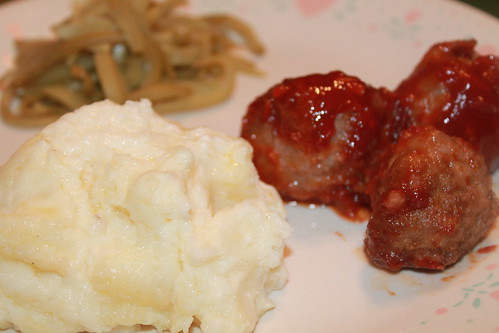
In order to serve mashed potatoes with meatballs, I had to convince myself that these were not meatballs.

They are not meatballs.

They are not meatballs.

They are not meatballs.

I may or may not have had to recite this again and again.

I also may or may not have said the word meatloaf again and again to convince myself they were meatloaf meatballs rather than Italian meatballs.

I knew that if I allowed myself to be confused, I would want to make pasta instead of mashed potatoes to go along with these 'meatballs', not meatloaf meatballs.*

*Note: Though PW pictures the comfort meatballs being served with mashed potatoes, she also says you can serve them with egg noodles tossed with butter.  Yum!

IMG_0481

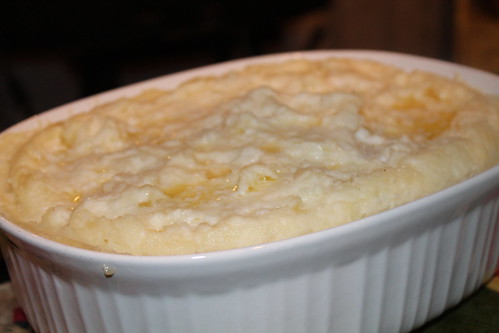
These recipes share a similar trait: they both take a lot of time to make.  The positive about the mashed potatoes is that you can make them ahead of time and save the final step of baking them for 30 minutes for later.  I haven't tried to do this yet, but Pioneer Woman says it can be done.  So I take a little comfort in that.

IMG_0483

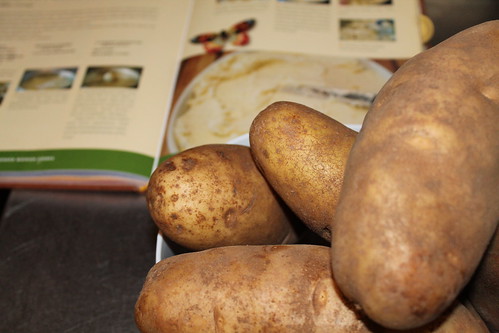
Up to the baking point, these guys are a lot of work.  Mashed potatoes usually are.  All the peeling, the chopping, the time to boil...it's quite a process.

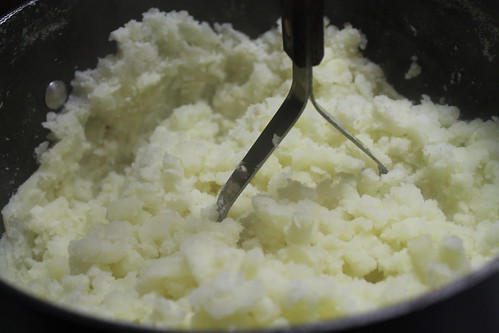
For these, she has you hand mash the potatoes.  Ugh.  I have been spoiled by using my immersion blender every time that I make mashed potatoes.  They are the smoothest, most delicious potatoes ever and whenever I serve them to friends they marvel at their consistency.

So, needless to say, mashing potatoes by hand was not something I wanted to do.

Especially considering it was five pounds of potatoes.

IMG_0484

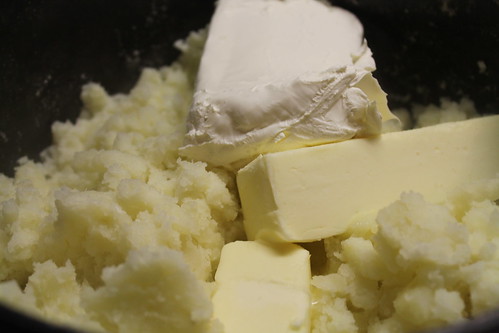
But then when I put the butter and cream cheese in, everything was right in the world.

IMG_0487

It's a little over the top, I'll admit, but since PW said to do it, I did it.

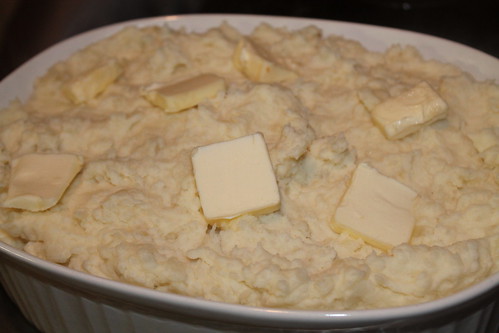
I topped the potatoes with hunks of butter.

IMG_0494

This is decadence like none other.

I recommend serving these potatoes when you are feeding large crowds (think Thanksgiving), but not for an ordinary weeknight meal.

IMG_0493

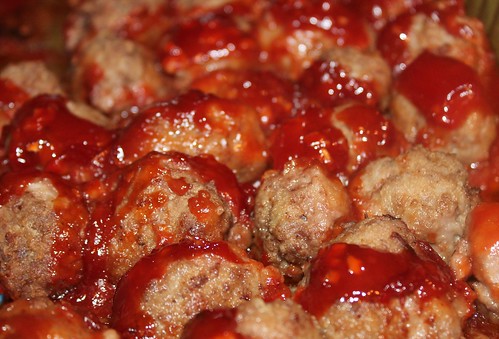
The comfort meatballs were fantastic.  But just like the mashed potatoes, they required a lot of time and even more work.

After mixing all the ingredients, the meatballs are refrigerated for 30 to 45 minutes to set.  I like to do this sometimes with my Italian meatballs, but these meatballs were so moist that they needed it.  It was difficult to shape them perfectly because of how wet they were.  Next time I would either use a little more beef or use an ice cream scoop to shape them.

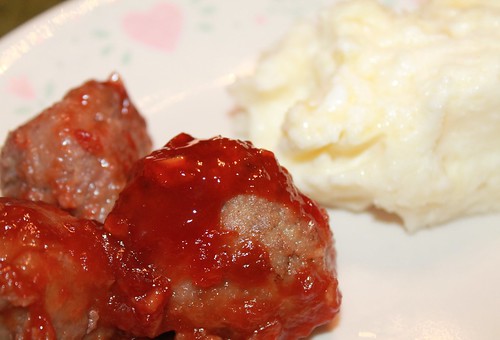
After the meatballs have set, they are to be dredged in flour, browned in a skillet, placed in a baking dish, covered in sauce*, and baked for 45 minutes.**

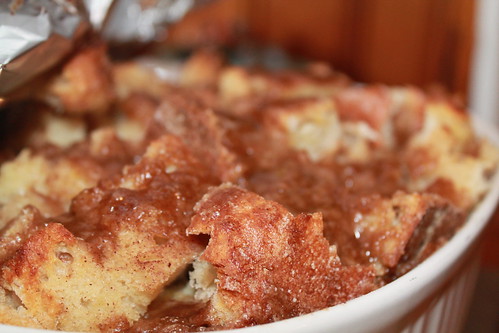
*The sauce was sweet, the sauce was delicious, and the sauce reminded me of meatloaf.  Perfect.

**Yes, this is real life.  I wanted to curse the day Pioneer Woman was born, but as soon as I tasted them I wanted to sing her praises.

IMG_0500

I did not make such a massive meal only for Hubby and myself.  

IMG_0504

Jon was the first to try it and, of course, loved it.  Then my brother, Justin, and his wife came over to help us eat the rest.

IMG_0505

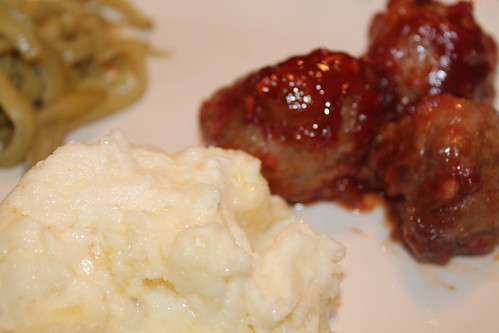
These two recipes are perfect for each other.  I would recommend making the mashed potatoes ahead of time so that they can be thrown into the oven when the meatballs go in.  This way, when it is closer to dinner time you can focus solely on making the meatballs.

Friday, December 6, 2013

Thanksgiving Delights: Part Four, Cinnamon Rolls

Recipe: Cinnamon Rolls
Source: The Pioneer Woman
Time: 3 hours
Ease: 10
Taste: 10
Leftover Value: 10
Down the Drain or Keep it in the Strainer: Keep it in the Strainer!

I've saved the piece de resistance for last.

Every single time I make these, something seemingly terrible happens and I fear the worst.

Something like, I double the batch instead of halving it.  Or, I forget to let the buns rise before shoving them into the oven.

You do things like this too, right?  Please say you do.

But in the end, they always come out looking like this:

IMG_6661


and all my fears subside.

Before I carry on, I want to take this moment to mention the star of my Thanksgiving breakfast:

IMG_6640


Dear dear butter.  How could we exist without the goodness you add to cakes and pastries?

I'm sure my thighs could still exist, but my heart would have an empty butter shaped hole.

Alright, enough of the sentimental stuff.

These cinnamon buns start out friendly.  The first steps require combining a warm liquid mixture with yeast.  Then, mixing it all together with flour.

A lot of flour.

Hence why I desired to cut the recipe in half a few years ago to no avail.

The dough sits for an hour.  I spend this hour trying to throw together one of my easier Thanksgiving breakfast recipes.  This year I spent this time making the Mini Cherry Pecan Pie 'dough'.

IMG_6657


I always use this pot and I'm always annoyed when after an hour is up I realize I meant to use my larger pot.

The moral of this story is: use a large pot.  And of course, don't be like me.

After the hour, baking powder, baking soda, and salt are sprinkled on top of the mixture.  They are then mixed into the dough along with another cup of flour.*

*Note: You will more than likely need to add even more flour.  I always knead the dough and then think, "Gee, this seems a little moist but I think it will work" and then I'm filled with regret later.

Because the step that follows is going to make your cinnamon rolls even more moist, gooey, and messy.  It's what takes this recipe from fun and friendly to painful agony.

Okay, I'm a little dramatic.  It isn't quite that bad.

IMG_6658


What you're looking at, dear friends, is what I imagine the entryway of heaven must look like.  Golden and delicious.

Alright, I'm not sure about the delicious part, but a girl can dream, can't she?

Because in the recipe she says you can use even more butter for the filling, I use exactly how much the recipe states (because even that seems a bit excessive considering the looks of the above picture).  This is followed by covering the butter with cinnamon and sugar.  The dough is then rolled towards you into one long luscious log of liberty.*

*This makes sense, I promise.

Because I like to give you the cold hard truth here about the recipes I try out, I am going to tell you the mixture of issues I always have at this step.  First of all, my cinnamon rolls always end up oozing buttery pools mixed with cinnamon sugar by the end of the roll.  The next problem is the dough isn't firm.  This doesn't create the perfectly formed cinnamon buns you see in all the Pillsbury commercials.  Instead my buns look like Pillsbury blobs.

Yet, once I assemble my blobs into their pans, bake them, and ice them, they always end up looking like this:

IMG_6664

So for all the faults I have encountered in making these gorgeous globs of goodness, I suppose if they always come out tasting delicious, that's all that matters in the end.

Sunday, December 1, 2013

Thanksgiving Delights: Part One

I've been in charge of Thanksgiving breakfast since I've been married.  It is one of my favorite things about Thanksgiving other than the turkey, the stuffing, the mashed potatoes, the after dinner dessert, the family time...okay, let me rephrase, it's my favorite part of Thanksgiving morning.

Other than the parade.

Usually I send out a family email blast to let everyone know breakfast is still on and that they don't need to bring anything because I'm crazy enough to attempt to make 12 completely different desserts within the two days before Thanksgiving.

In case you're wondering about the dessert part, this post should explain everything: Thanksgiving breakfast

This year I found inspiration in summer party invitations I saw on clearance at Target.  The invitation was a two-tone ice pop (with stick and all) and on the back was where the details of the party were to be written.  I loved this, but couldn't see using ice pops for a Thanksgiving dessert breakfast.

After a little thought, the pumpkin pie invitation was born:

IMG_6507

I always try to switch up the menu a little bit.  Last year was the year of the mini desserts.  Mini desserts are great because guests are always afraid to be the person who takes the first slice of pie or cake.

The tough item to make mini was pumpkin pies.  Pumpkin pie should take only about 30 minutes (at most) of prep time.  Shorter even if you are using canned pumpkin and a pre-made crust.  But me, I'm married to my better than pumpkin pie recipe which uses fresh butternut squash instead of canned pumpkin.  Making this into mini pumpkin pies took collectively about 3 hours of my time.

It was so worth it.

20131126_152128

What helped the process move along smoothly was this pancake pen I bought ahead of time:

IMG_6606

I am absolutely in love with this item.  The pumpkin pie mixture for this recipe is extremely liquefied.  Knowing this before hand, I figured a pancake pen would make life so much easier.

Boy am I happy when I'm right.

IMG_6608

Some of the other items on my menu were:

IMG_6680

Just like, in fact better than, Starbucks petite vanilla bean scones.  While scones are typically a little more on the dry side, the icing on these trap the moisture in and each bite is moist with vanilla bean deliciousness.

My sister-in-law, Kristina, helped me pick this one out:

IMG_6694

Baked French Toast.  Oh-my-goodness.  While I know this isn't really a dessert, I wanted to have a somewhat breakfast item to offer.

That's what I said to my sister-in-law as we discussed and decided on Baked French Toast to fulfill that desire of mine.  The truth was I wanted to make cranberry butter, and I figured this would be the perfect thing to put it on.

It was.  It most certainly was.

Look for the recipe for cranberry butter in one of the upcoming posts.

I love cheesecake brownies, it is my go to treat at Starbucks these days.  I thought I would concoct my own cheesecake pumpkin bar.  As Thanksgiving day got closer, and my body got run down with an unwelcome seasonal cold, I hadn't yet settled on what I would be doing to make my cheesecake pumpkin bar come to life.  That's when a coworker told me about these:

IMG_6678

Please don't judge me when I say this, Paula Deen should be sainted.

There.  I said it, and I meant it.

I love her almost as much as I love the butter she uses in all of her recipes.

These Pumpkin Gooey Bars were just as good as the pumpkin cheesecake bars I was dreaming up.  The cake crust on the bottom gave a great balance to the sweet creamy pumpkin mixture on top.  They were yummy cold or even warmed up for about 15 seconds in the microwave.  Either way, top it with a little cool whip and you've got pumpkin heaven in bar form.

About a week before Thanksgiving, I realized I had no chocolate on my breakfast menu.

No chocolate.  No a lick, drib drab, ounce, drip drop, or even an iota of chocolate on the menu.

For shame, I know.

I looked through my clipped recipes that I have yet to make and found these glorious masterpieces:

IMG_6684

Smores brownies.  Oh yes.

I've made another version of smores brownies before and was highly disappointed.  While they were decent brownies, they were hardly worthy of being considered smores brownies.

These most certainly were.  They were the one item on my breakfast table that I didn't have any left overs of.  Now that has to say something about them!

Go here for the recipe: Inside Out Smores Brownies

It seems this was the year of last minute additions.  I am typically not into fruit desserts.  Cherries, however, I have a soft spot for.  When I saw these mini cherry pecan pies in an ad for Lucky Leaf Cherry Pie Filling, I knew I had to make them....if I could find the time.

IMG_6672

They were mini, which made them even more necessary to add to my breakfast table.  They took a little longer to bake than the recipe said, otherwise they were perfect.

For the recipe go here: Cherry Pecan Pies

I've saved three recipes to give you a blow by blow, step by step, look at.  Up first will be Cranberry Butter.  
You won't want to miss it.  

Friday, August 24, 2012

Better Than Pumpkin Pie

Recipe: Better Than Pumpkin Pie
Source: http://allrecipes.com/recipe/better-than-pumpkin-pie/detail.aspx?event8=1&prop24=SR_Title&e11=better%20than%20pumpkin%20pie&e8=Quick%20Search&event10=1&e7=Home%20Page
Time: 1 hour 20 total
Ease: 3
Taste: 10
Leftover Value: 10
Down the Drain or Keep in the Strainer: Keep it in the Strainer!

Not Pumpkin Pie, BETTER Than Pumpkin Pie!
I am not a pumpkin pie lover.  In fact, I can't remember the last Thanksgiving that I ate a slice of pumpkin pie.  I always find them to be too heavy and the consistency to be too thick that after one bite I've had my fill of pumpkin taste.  (Then it's on to the chocolate desserts...)

Therefore, I've never made a pumpkin pie before.  I hear that using real pumpkin to make it can be a bit of an ordeal.  The challenge of using a real pumpkin (rather than canned pumpkin) is the only thing that ever tempts me to try my hand at making pumpkin pie.

But now I don't have to.  My good friend, Amy, who I've known a bazillion years, has a CSA (Community Supported Agriculture) membership.  This means that during certain months of the year she gets a share of the local farmers crops.  I'm pretty sure this is the most awesome thing in the world.  Whatever they have a lot of that week, she gets a lot of.  And when she gets a lot, I get to share in her bounty.  Did I mention that I love Amy?

She's brought over anything from kale to collard greens, from zucchini to cucumbers, from red kuri squash to this week's butternut squash.

Amy's mom, Wendy, who I also love very much, sent over a recipe to go with the butternut squash.  It's name: "Better than pumpkin pie" had me intrigued.  I had to make it immediately.

It was everything I have always wanted in a pumpkin pie.  Creamy and light, but not lacking any of the usual flavors of pumpkin pie.  The one exception was it doesn't use any pumpkin.  Not a lick of the orange beast.  As you might have guessed, the secret ingredient in this recipe is the butternut squash from Amy's CSA crop this week.

The squash was not very big, so I thought perhaps I wouldn't have enough for the one and a half cups that the recipe called for.  I was wrong.  It was absolutely perfect.

Peeling and chopping the squash up, on the other hand, was an interesting event, one I wish I had taken pictures of.  

After the squash was chopped, it boiled in water for a few minutes.  Then all the remaining ingredients needed to be blended together with the squash.

It wasn't until I poured my batter into the pre-made pie crust that I bought at Bottom Dollar Food just for this occasion that I remembered reading or hearing somewhere that pies like such should be placed on top of a baking sheet.  I remembered this tip when I tried to pick up the pie and the filling began to shake back and forth until it spilled drastically over the sides of the crust and onto my stove top burner.  (I guess I should mention here that I chose to do this on top of my stove....not a good life choice at all).

After the pie was placed on the baking sheet everything was coming up daisies.  It baked for 50 minutes and despite all that I spilled onto my stove top, the filling was perfect.

I am definitely adding this to my desserts to make for Thanksgiving breakfast*.

 
*I just realized, I've never written about Thanksgiving breakfast.  Look for it around Turkey Day.  You won't want to miss it.

Sunday, August 19, 2012

'Blah' Baked Corn Mash

Recipe: Baked Corn Mash
Source: The Orange Strainer
Time: 45 minutes total
Ease: 2
Taste: 3
Leftover Value: 2
Down the Drain or Keep in the Strainer: Down the Drain!

I gave myself a longer break than normal from posting.  I have my reasons.  After a few unsuccessful recipes, I didn't have the heart to post about my failures right away.  This recipe is one that works great when you follow the original recipe and cook it in a slow cooker, however, my rendition was just blah.  And yes, I have dubbed 'blah' to be a new cooking term.  In fact, in my recipe books, when I don't like a recipe I write 'blah' next to it.

I'm not kidding.  I seriously do that.


Here's what you need**:

1 can creamed corn
1 can frozen corn*
1 cup corn meal*
1/4 cup milk
1 egg
2 Tbsp butter
1 Tbsp sugar*
1/2 tsp salt
1/4 tsp black powder
1/4 tsp garlic powder

**Now, I know you're thinking, 'This recipe was a complete flop, why give the recipe?'.  What I want to make very clear is that this is an awesome recipe when you change three of the ingredients and throw it all into a slow cooker on low for 3 hours.  I've made it for Thanksgiving for the past two or three years and it's a hit.

So, if after reading this post, you think you'll be more successful with the slow cooker just change the items with a * to:

1 quart frozen corn
1 box (8.5 oz) corn muffin mix
2 Tbsp sugar

Now, back to the 'blah' recipe...


Start with a can of creamed corn.  I never tasted the uniqueness that is creamed corn before going with my husband.  And when I had it, I couldn't understand why anyone would want to eat corn like that.  But, it definitely works great in a recipe like this one.  The original recipe calls for a quart of creamed corn, but I never put that much in.  It is too much wet ingredient for me.


Because I was baking this, and had chosen a smaller baking dish, I used less frozen corn than normal.  Normally I will fill the creamed corn can twice.  For this recipe, I filled it once.  However, I'm positive this is not what lead to this recipe's downfall.


Toss in the frozen corn.


This is, I'm sure, what lead to the lack of flavor in my corn mash.  I used a cup of corn meal rather than a box of cornbread mix because, well, I didn't have any cornbread mix.  I realize they are two totally separate things, however, how would I really know if I didn't try?  


Pour the milk all over.


Beat the egg in a separate bowl and then pour all over.


Lightly mix the ingredients together.


Sprinkle the seasonings all over and lightly mix them in.


Top with the butter.


And bake for 45 minutes or longer.


Here is what I have to say in favor of this recipe.  If you, yourself, and yours like a good bland cornbread, this is actually pretty good.  But, if you like something that has a flair of cornbread, but is not dry and bready like cornbread, then make this in the slow cooker with the adjustments at the top and you will not be disappointed.

P.S.  Make it for Thanksgiving along with my slow cooker mac and cheese and everyone will think you've worked so hard all day long.  They'll give you just as much credit as the turkey cooker.  Then you'll smile to yourself thinking about how easy it was to make.

And feel just a little bad that you weren't the one making the turkey.