Showing posts with label pumpkin puree. Show all posts

Tuesday, January 28, 2014

Pumpkin Gnocchi with Butter Walnut Sauce

Recipe: Pumpkin Gnocchi with a Butter Walnut Sauce
Source: http://www.foodrecipeshq.com/pumpkin-gnocchi-with-a-butter-walnut-sauce/
Time: 20 minutes
Ease: 2
Taste: 3
Leftover Value: 4
Down the Drain or Keep in the Strainer: Down the Drain*

*Note: I made an adjustment to the recipe.  I plan to try it again without the adjustment.  My hopes are high, but perhaps too high.  Sigh...

I have made gnocchi once before.  You might remember from this post.  While the taste was delicious, it was a laborious task, which outweighed any delight I may have experienced.

IMG_7198

Considering that this gnocchi was not one made of potatoes, I didn't anticipate the same struggle.  However, considering that I was using whole wheat flour per the guidelines of the Daniel Fast that I was semi-somewhat-kind-of-in-a-way following, I decided that I would be good and use whole wheat flour. 

I knew by using whole wheat flour that I was already marking this recipe to be a loser.*

*Note: I'm sorry to those whole wheat lovers out there.  But as I've stated before, I know cardboard that is tastier than whole wheat flour.

IMG_7205

IMG_7206

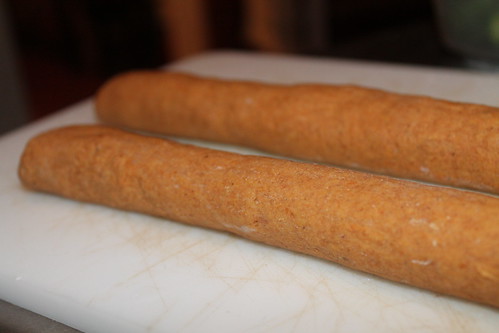
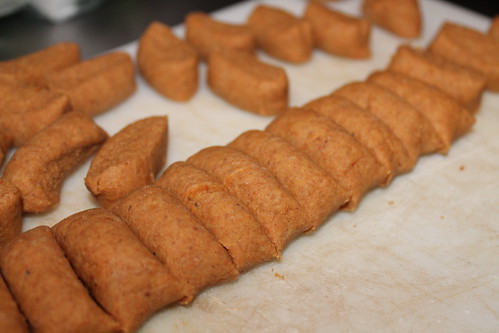
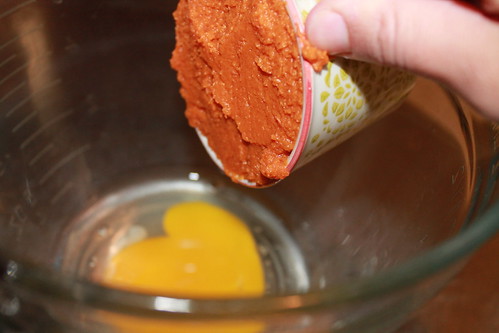
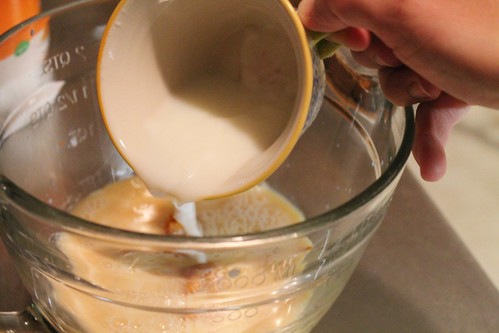
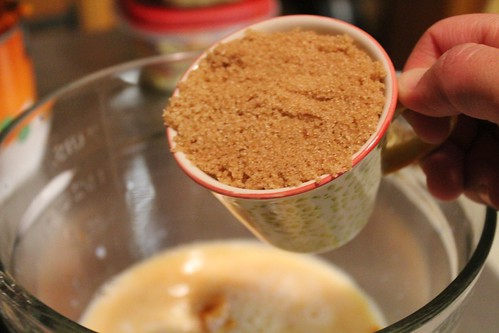
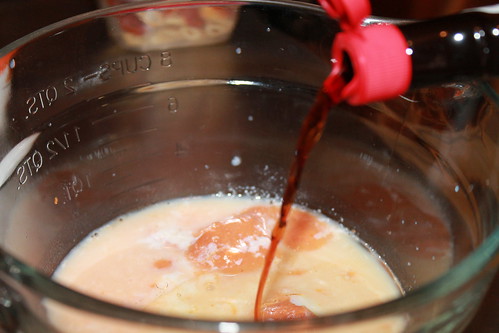
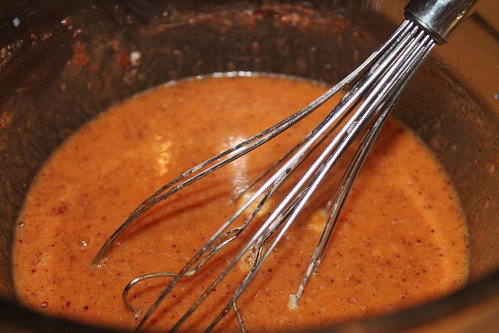
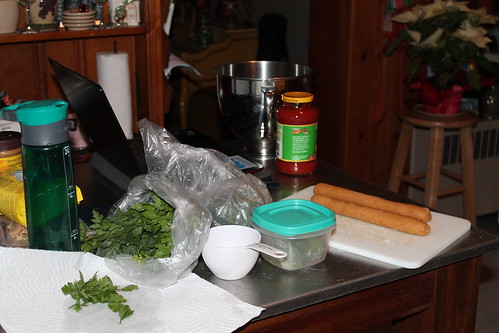
These were stupidly simple to make.  In fact, it was about as easy as: mix all the ingredients together, roll them into a cylinder, and slice.

IMG_7213

IMG_7214

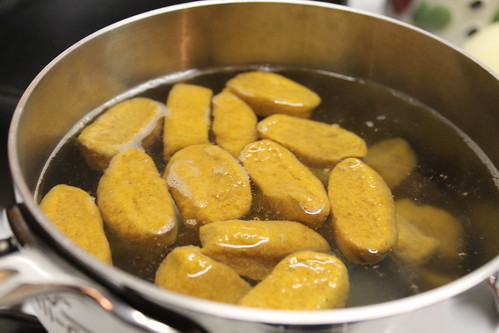
From there, the gnocchi was tossed into a pot of boiling water.

Let me take a moment to tell you how much faster water boils now that I am using All Clad pots.  I have the fastest boiling water in the nation.  My water boils so fast, I have to tell it to slow down so I can catch up.

Okay, I'm done.

I just thought you might like to know.

IMG_7216

IMG_7219

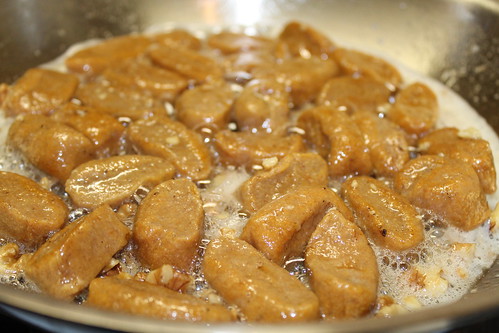
Here was a promising part to this recipe: butter.

Then again, butter didn't quite meet the guidelines of the fast I was supposed to be sort-of-kind-of following.  Then again, Hubby (who was strictly following the fast) was still away in LA when I made this recipe, so I decided I'd let the butter part of the recipe stay.*

*Which makes me wonder why I couldn't have just let the white flour part stay too.

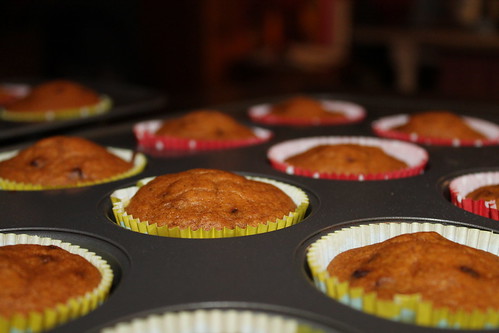
The gnocchi fried with crushed walnuts in butter until they were crispy and delicious---looking.  Key word: looking.  

IMG_7223

IMG_7229

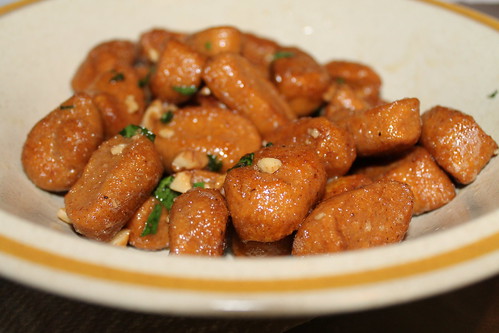
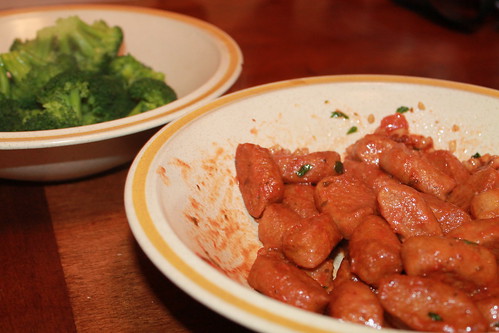
One point of major annoyance is that the pumpkin flavor didn't come through at all.  The recipe's author even states that, making me wonder why we even bothered to put it in in the first place.  She does recommend serving the gnocchi with tomato sauce, which I didn't need to read twice to do.

Though I found the gnocchi to be heavy and bland, I would have found it to be absolutely unbearable without the tomato sauce and broccoli I served on the side.   

After eating a small serving I found myself to be full.  

This is a ground breaking, earth shattering comment.  I was full.  I had hardly eaten anything, or so I thought.  But apparently, all that whole wheat goodness packed together brought cause for my stomach to actually say, "I''m good."

I haven't totally written it off yet, but I'm pretty sure that even with white flour the consistency of gnocchi made this way is still going to be much heavier than the light and moist delight of sinking your teeth into a piece of gnocchi made with the starchy goodness of potatoes.

************

If you haven't noticed, Orange Strainer has an "Index" section now.  Hopefully this will help in finding specific recipes you might be interested in or looking for.


Wednesday, November 6, 2013

Chocolate Chip Pumpkin Muffins...the way they should be

Recipe: Pumpkin Chocolate Chip Muffins
Source: The Minimalist Baker
http://minimalistbaker.com/pumpkin-chocolate-chip-muffins/
Time: 40 minutes
Ease: 2
Taste: 5
Leftover Value: 5
Down the Drain or Keep in the Strainer: Down the Drain*

*With my adjustments, it becomes Keep it in the Strainer!

During fall, I jump on the pumpkin bandwagon just like the rest of the world.*  In fact, you might remember how I became a little obsessive with pumpkins last year.  This year, time hasn't lent itself for me to make my own pumpkin puree.

*Note: Except for Starbucks' pumpkin spice latte (currently being trendily called "PSL").  For some reason, I not only dislike the PSL, I strongly dislike it.  I drink pumpkin coffee and lattes other places, but my beloved Starbucks has not met with my satisfaction on this one.*

*Note to the note: I'm really sorry about this.  Please don't judge me.


The season is still young, yet this unfortunate lack of time means that I've been using this stuff:

IMG_6405

I've been bookmarking and dog earring tons of pumpkin recipes from magazines and the bazillion blogs that I follow.  I've also been concocting a few of my own--hello, pumpkin scones!

My first pumpkin choice came out of necessity.  There was nothing to eat for breakfast in my house and I decided chocolate chip pumpkin muffins would be the perfect choice.

The blog I got the recipe from is one I started following recently.  While it was obvious before she even stated it that these are "vegan" muffins, I knew I would be making adjustments so that these muffins would work in my normal world kitchen.

For example, she uses a "flax egg" which is made from flax seed meal and water.  Well, flax seed meal is expensive, and I happen to always, always have eggs on hand.

Therefore, adjustment to the recipe #1: "flax egg" replaced with chicken egg.

IMG_6411

I have had these dainty measuring cups hanging around in my kitchen for years now.  I bought them a little before I started the Orange Strainer but never had the nerve to dirty them.  Then the dust in my kitchen found them and I decided they would be better used measuring food than measuring the dust.

IMG_6416

The second adjustment to this recipe came right after the first.  It called for almond milk with 1 T of lemon juice which is basically just homemade buttermilk, except for the fact that they are using almond milk.

Are you confused?   Because I certainly am.

I used 1% milk to make buttermilk.

Oh boy.

IMG_6424

Next, making sure that each of my four dainty cups was able to be used for this recipe, some brown sugar needed to be thrown in.  So far, the only normal part of the recipe.

IMG_6427

If you're feeling particularly pretentious, grab your grape seed oil (seriously?) and pour in 2 T.

IMG_6430

Since I can't imagine grape seed oil truly making a world of a difference in pumpkin muffins, I went with the good old fashioned canola oil that was hiding under my sink.

IMG_6432

Add a splash of vanilla.  Whisk together everything you've put in so far.  Then sprinkle in the baking powder, baking soda, salt, and cinnamon.  Whisk again until the mixture looks like this:

IMG_6440

Now for the adjustment to this recipe that not only saves money, it actually makes it taste better.  The recipe calls for what I call a 50/50 flour mixture.  Meaning, you're trying a little bit to be healthy by using whole wheat flour, but you're also being a little naughty by using, gasp, white flour.

I've tried it this way, and it gives the muffins a deliciously cardboard type flavor.

Yum?

No.  

Exactly.

Swap out the 3/4 cup of whole wheat flour for more white flour.  Save the whole wheat nonsense for another recipe on another day.  Your taste buds will thank me.  

Regardless what kind of flour you choose to use, sift the flour directly into the pumpkin mixture.  This is awesome because it leaves you only using one mixing bowl.  (Not counting the sifter, the measuring cups, and measuring spoons).

IMG_6442

Toss in 1/3 cups of chocolate chips.  I only had mini chocolate chips, so that's what I used.  Personally, I would prefer the regular sized ones.  

IMG_6445

Also, I personally wanted more than 1/3 cup of chocolate chip as you can see by my cup which I filled to overflowing.

IMG_6447

I used an ice cream scoop to fill my muffin cups.  The first time I did only one scoop and managed to fill 18 cups.  I wasn't too happy with their size.

IMG_6451

Nothing says muffin like a muffin top, which sadly, this is lacking.

IMG_6458

My second time around I filled the cups with a scoop and a half, filling only 12 muffin cups.  Then I did this:

IMG_6461

You really can't have chocolate chip muffins, even if pumpkin is the main attraction, without a healthy sprinkling of chocolate chips on top.

IMG_6462

Much better.  I think using the mini chocolate chips here makes for a much more inviting muffin.

IMG_6463

With my adjustments, these muffins were worthwhile.  They were still not drop everything you're doing and do the happy dance delicious, but definitely worth making again.

Friday, November 16, 2012

Mini Pumpkin Bundt Cakes

Recipe: Moist Pumpkin Bundt Cake--Mini Style!
Source: Taste of Home
http://www.tasteofhome.com/Recipes/Moist-Pumpkin-Bundt-Cake
Time: Approximately 1 hour, so long as you don't make your own pumpkin puree first.
Ease: 3
Taste: 7
Leftover Value: 10
Down the Drain or Keep in the Strainer: Keep it in the Strainer!

By now, you know of my pumpkin puree mission and also of my pumpkin puree failure.  In a flash, here's what it looks like:


Failure photo removed for your safety.


Whew, thank goodness that's over with.  

Before the pumpkin puree failure of two days ago, I made pumpkin puree with these bad boys in mind:


And of course, there is a reason behind them as well.  I decided to make all my Thanksgiving desserts this year mini.  So I thought, 'What on earth is cuter than mini bundt cakes?"

The answer?

Nothing.  Except maybe mini cheese cakes.  Or mini trifles.  Or mini cinnamon rolls.

But more on that later.

This was the first recipe I found when looking for pumpkin bundt cake recipes.  Then I convinced myself that there had to be a better one out there somewhere.  After a very unfortunate amount of wasted time searching, I decided my first instincts had been best.

If you make this bundt cake in a regular bundt cake pan, it will take about an hour to bake.  However, in the mini bundt pan, it takes about 15 minutes per batch.

And please, whatever you do, don't forget to grease the pan on the last batch.  It isn't a pretty situation to deal with.


What I especially loved about these cakes is that they are just as good the next day as they were fresh.  In fact, I'm planning to make them again today, and then freeze them and see how they fare on Thanksgiving.

Yes, I know, I probably do not need to freeze them for the six days until Thanksgiving but I have serious leftover issues.

Please don't judge me.

The only negative, and the reason I gave them a 7 for taste, is that I felt there was something missing.  The missing elements is what I'm titling, 'The Streusel Effect'.  A streusel typically involves some kind of delightfully crumbly, buttery topping.  However, they also tend to have a cinnamon, sugar, and butter mixture hidden somewhere.

Next time I make these pumpkin bundts, my plan is to make the cinnamon-sugar-butter mixture and toss it in the middle of the batter.

I'm beside myself with excitement to see how it turns out.  


Thursday, November 8, 2012

How to Make Pumpkin Puree

Until this summer when I made my Better Than Pumpkin Pie I had never made pumpkin pie before. Therefore, I also had never bought canned pumpkin and used it to make pumpkin pie.  I also never had a mental debate over whether to use canned pumpkin or real pumpkin.

After I made Better Than Pumpkin Pie, I became determined to make my own pumpkin puree to use for real pumpkin pie.


Then I decided that I liked Better Than Pumpkin Pie so much, that there was no need to search out a different pumpkin pie recipe.  Pureeing a pumpkin was still in my future though, only I now planned to use it in a pumpkin bundt cake.

This leads me to today's How To.  Sorry for all the detours.  I wish I could promise that it won't happen again.


You'll want to get yourself a few adorable sugar pumpkins.  Buy them a few weeks before you plan to make your pumpkin puree so that they can decorate your house and make you smile.


One 15-ounce can of pumpkin puree = about one and three quarters cups of puree.  Two sugar pumpkins yielded exactly that for me.


Cut the pumpkins in half.  This is the hardest part.  I wanted to cry and call hubby home from work to do it for me.  If you can make it past this point, you'll be fine.

I should say, if I can make it past this point, you'll be fine.

After cutting the pumpkins in half, scoop all their guts out and place in a small bowl.


Lightly oil a baking sheet and put the pumpkin halves face down.  You'll notice that I cut off the stem of my pumpkin.  This is not necessary.  I just like to make life difficult.

Bake at 400 degrees for about 40 minutes.


While the pumpkin corpses are baking, grab your bowl of pumpkin guts.  Separate the seeds from the gushy innards and discard all traces of orange.  You must get every single speck of orange off or else utter calamity will befall you.

Just kidding.  But I had you worried, didn't I?  


My two sugar pumpkins yielded half a cup of pumpkin seeds.


I decided to make olive oil and sea salt pumpkin seeds.  

Pour 1 tablespoon of olive oil over the seeds and toss lightly.


Add about one teaspoon of sea salt.  Toss lightly.

Put the pumpkin seeds to the side as your pumpkins finish up baking.


For the love of everything pure, holy, and good, let the pumpkin halves cool for five to ten minutes.  I say this because my fingers are still burning due to my impatience.

After the pumpkin halves have cooled, use a spoon to scoop the pumpkin meat off the skin.  If the pumpkin baked long enough, this should be extremely easy.


If you are anything like me you'll look at your pumpkin skin and say, "Gee, I wish I could do something more with this,"


And then you'll realize that trash is trash.  So, you'll put those pumpkin skins in the trash.


Puree the pumpkin meat in a blender or food processor.


When it is smooth and looks like baby food, it's ready.


Either use it immediately in pumpkin pie, pumpkin bundt cake, or anything that calls for canned pumpkin or refrigerate or freeze until you're ready to use it.


When all the excitement of pureeing the pumpkin has died down, spray a baking sheet with cooking spray and spread the pumpkin seeds out.

Bake at 350 until they start to brown or pop off of the pan like popcorn, whichever comes first.  Mine only took about seven minutes.


Toss them in a bowl and feel unashamed as you snack on the entire thing alone.  After all that work pureeing the pumpkins, you've earned this little treat.