Showing posts with label parmesan cheese. Show all posts

Monday, August 25, 2014

What To Do With All This Squash?

Recipe: Potato, Squash, and Goat Cheese Gratin
Time: 65 minutes (prep and baking time)
Ease: 3
Taste: 6
Leftover Value: 5
Down the Drain or Keep in the Strainer: Keep it in the Strainer!

IMG_9535

My husband decided to plant an abundance of yellow squash this summer.  He claims he planted other things.  Other things like zucchini, peppers, carrots, and cucumbers.  Our crop yielded none of those things, save four cucumbers and never-ending yellow squash.

We reached a point during dinner, when yellow squash was yet again the side dish, when we both looked at each other and said, "I think I'm tired of yellow squash."  

I could be to blame.  I don't get too fancy with my veggies.  I slice 'em, dice 'em, and cook 'em.  After making my entree, I don't really have the time to be bothered with side dishes.*

I decided to search for a recipe that would highlight the yellow squash and make it lovable again in my house.

Potato, Squash, and Goat Cheese Gratin was the perfect choice.

*Note: This is a lie.  It should really say, "...when cooking for the two of us."  Because, when I am making a meal for family and/or friends I go all out.  

IMG_9497

The best part of this recipe was using the mandoline to slice the potatoes and squash.  I've used my mandoline maybe five times--tops--in the seven years I've been married.  I know how wonderful it is, but somehow I always convince myself that I can slice things by hand just as perfectly as the mandoline can.

Then I begin to use it and realize just how wrong that thought is.  For starters, you can't beat the ease of just sliding your vegetable back and forth to create even and uniform slices.  Not only that, but clean up equals basically the same amount of kitchen materials if instead you had used a knife and cutting board.

IMG_9500

That said, I'm hoping to incorporate mandoline use into my kitchen a little more in the future.

IMG_9508

After slicing the potatoes and squash, tossing them with some olive oil, 1/3 of the mixture is spread out in a dish.  The recipe said it didn't matter how they were laid out--in other words, it didn't need to be a perfect pattern of potato-squash-potato-squash, but my perfectionist side of me had a difficult time completely following that step.

IMG_9518

Goat cheese is sprinkled on top of the first layer of veggies.  These two steps are repeated and the second layer of cheese is topped with the remaining potato and squash.

IMG_9521

The recipe boasts that it does not use cream, only a splash of milk (1/4 cup) to keep the vegetables tender.

IMG_9524

A sprinkle of fresh grated Parmesan cheese adds a little more flavor and charm to the top of this dish.

IMG_9533

And of course, so does a sprinkle of fresh basil, picked from the garden, next to--you guessed it--more squash.

IMG_9538

I served this for lunch one summer Saturday.  Hubby needed some protein to go with it, so I seasoned some chicken breasts and pan fried them in a little olive oil and butter combo until they browned.

I didn't expect Hubby to enjoy this dish.  As I've said before, he's unpredictable.  Surprisingly, we both really enjoyed it.  He had no complaints.  My only issue was that I felt the goat cheese was a little over powering and it took away from the veggies.  My future adjustment to the recipe would be to first try it with half the amount of goat cheese.  If it was then lacking a desired amount of cheesiness, I would play around with adding two ounces of another cheese--hello, Feta?

Thursday, January 23, 2014

Noodles Made of....Zucchini?

Recipe: Zucchini Noodles with Pesto
Source: Two Peas and Their Pod
http://www.twopeasandtheirpod.com/zucchini-noodles-with-pesto/
Time: 15 minutes
Ease: 5
Taste: 5
Leftover Value: No leftovers
Down the Drain or Keep in the Strainer: Down the Drain!

I warned you that I wasn't doing very well with my vegetarian eating.  This said, try not to be surprised by the Down the Drain rating on the next couple of recipes that I post.  I will do my best at the end to offer some suggestions that could possibly have converted the recipe from Down the Drain to Keep in the Strainer.

Zucchini noddles.  I love them.  In fact, I thought I had already posted about a fantastic recipe I make with zucchini noodles, but sadly I realized as I began searching for it that the pictures are still in the "Not Posted Orange Strainer" file on my computer.

This means you'll have to trust me.

IMG_5169
Photo proof of my previously made zucchini noodles.  Again, you'll have to trust me...
When I found another zucchini noodle recipe that involved pesto, I knew I needed to try it during my vegetarian days.  I have to admit, from the get go I was a little apprehensive.  A quarter cup of Parmesan cheese seemed far too little for a pesto sauce.  But I followed the recipe (as I always do) regardless.

I liked the idea of slicing the zucchini with a mandoline slicer.  My other zucchini noodle recipe uses a vegetable peeler to slice the zucchini into thick strips, which is also fun and reminds me of egg noodles.  The mandoline slicer allowed for a thinner strip which appeared much more noodle like.

The recipe's author states the meal was eaten cold.  I couldn't imagine doing that, so I pan fried the noodles in the sauce for about three minutes.  Topped with tomatoes, it certainly looked like a masterpiece.  It tasted, well, just okay.  I was able to eat the entire thing, however, it left more to be desired.

IMG_7193

Now for the negatives.

The sauce was too thin, clearly lacking extra necessary cheese.  While most pesto sauces call for pine nuts, I've found that they are not essential for the flavor.  Parmesan cheese is.

The recipe states to use four small zucchini and also that the recipe should serve four.

Oh me, oh my.  I don't know what kind of sized tummies the writer and lunch guests had, but I used one rather large zucchini and if Hubby had been home to enjoy this meal, we both would have been starving our brains out after splitting the portion that this recipe made.

What would I do in the future?

For starters, of course, more Parmesan (as if you haven't heard me say it enough yet).

My natural urge is to coat some chicken, fry it, and toss it in the bowl with the noodles.  However, in addition to the added protein that I am dying for these days, I would also add a small portion of linguine or fettuccine in with the zucchini noodles to make the dish a little more filling.  Let's face it, eating a zucchini and a tomato for lunch or dinner isn't going to fill any bellies for a long period of time.

Wednesday, October 30, 2013

Sliced Baked Potatoes

Recipe: Sliced Baked Potatoes
Source: Great American Recipes
Time: 1:15
Ease: 3
Taste: 5
Leftover Value: 2
Down the Drain or Keep in the Strainer: Down the Drain!

I love potatoes.  I have always loved potatoes.  I remember telling my second grade teacher that I wanted to eat mashed potatoes for breakfast, lunch, and dinner.  She told me that I would get tired of eating them after a while.  I didn't believe her.  I couldn't imagine how anyone could ever tire of the buttery goodness that is mashed potatoes.

But just in case she was right, it's a good thing I never tried it.

Because I still love potatoes, and my heart would be broken if I didn't.  

Mashed.  Baked.  Scalloped.  Smashed.  Fried.  

It doesn't matter.  They all make my heart sing.

This particular potato, of this particular recipe, sadly left a little more to be desired.  It is my future hope to come up with a fabulous rendition of this "Down the Drain" recipe that will transform it into a "Keep it in the Strainer" option.

*And perhaps, this is the sparking of a new idea for this blog: "Down the Drain" recipes become "Keep it in the Strainer" ones?  I'm loving the sound of it.

The start of this recipe makes it seem a rather serious task.  After cutting or peeling off undesirable parts of your potatoes, make slices across the short side of the potato spacing them only about a quarter of an inch.


While I disliked this recipe, it did teach me how to make this slicing action happen.  Whenever I learn something that I can use in the kitchen, success has been found.

Place a spoon face down on your cutting board and its handle will act as a stopper for the blade.  This way you don't end up cutting your potato into chunks instead of a still attached sliced potato.


There were a few slices that went a little too far, creating hinged pieces in my potato (see following picture).  Next time I'm going to try sliding the highest point of the spoon's handle with me as I go along with the knife.


Place the sliced potatoes into a baking dish.  Open them up a little, but not too much or the areas you cut too far in will stick out like a sore thumb just like.....oh yes, the potato that is front and center in this shot.

Here's a mini confession: I love red potatoes.  Sometimes, I will just completely ignore all other potatoes in the grocery store.  I know, I need to broaden my horizons, but red potatoes have never steered me wrong.


Sprinkle the potatoes with a little salt.


This part.  Ah, this part.  It makes me wonder how these potatoes didn't instantly transform into delicious mountains of goodness.

Drizzle 2-3 T of melted butter over each potato.


The recipe gives you the option of sprinkling 2 to 3 T of chopped fresh herbs or 2-3 tsp of dried herbs.  I went with a dried mixture because I didn't have anything fresh on hand.

Bake in a oven that has been preheated to 425 for 50 minutes.

Then sprinkle with 4 T cheddar cheese and 2 T Parmesan cheese.


Hello fresh Parmesan cheese.  I love you.  I'm sorry I wasted you on this recipe.  But it was for the sake of experimentation.

My gut says, 'We need more cheese'.  Definitely.  We will have more cheese next time around.


Place potatoes back in the oven for another 10 to 15 minutes.

If I was rating this recipe on looks alone, I'd give myself a 10 for delicious looking factor.


Maybe it was a bad batch of potatoes.  (But they're red, so how could it be?)  But maybe not.  There is a future for this recipe, just not the one that currently exists.  Keep your eyes open for its come back.

Sunday, October 13, 2013

Mac and Cheese That Is...wait for it...Healthy?!

Recipe: Healthy Mac and Cheese, with a twist
Source: Fitness Magazine
Time: 1 hour
Ease: 4
Taste: 9
Leftover Value: 9
Down the Drain or Keep in the Strainer: Keep it in the Strainer!

I have made a lot of mac and cheese in my days as a wife, and even before that during my days as a college student.  Of course, it has not always been homemade.  In college, I thought nothing less of myself than to serve up mac and cheese from a box.  Today when I reach for that box of mac and cheese I always think, "You can do so much better".

Here's the catch.  Here's the reason that keeps me serving up boxed mac and cheese when it's 6:55 pm and I haven't started dinner yet and Hubby will be home in 20 minutes: Hubby loves boxed mac and cheese.  In fact, he constantly tells me that if he came home to hot dogs and boxed mac and cheese once a week for dinner, he would love it just as much as the semi-gourmet variety that I try to constantly set before him.

Hot dogs and mac and cheese...once a week?

My skin crawls at the thought.  It's almost as bad a thought as having a 'leftover night'.

I'm a snob, I know.  The first step to dealing with your issues is admittance, right?

The even stranger thing in this wacky world of mac and cheese is that any mac and cheese I have made without the box, Hubby has still preferred the box.  I was slightly offended, especially after I had made my slow cooker mac and cheese for Thanksgiving and my entire family tasted it then held hands and sang a song of thanks to the heavens for the deliciousness that was my mac and cheese.

Instead of sticking with this mac and cheese which all the normal people in the world said was perfection, I continued to seek out a homemade mac and cheese that would cause Hubby to resound my praises far and near.

I almost thought it couldn't be done.  Until we started this healthy kick to lose weight (20 pounds and counting...) and I scoured the internet for healthy mac and cheese recipes.

The secret to this delicious mac and cheese is Rocco's Secret Weapon.  Ordinary mac and cheese involves a lot of milk and sometimes, butter.  When flour is added to this it makes what is known as a Bechamel sauce  This adds texture to mac and cheese, but unfortunately with the additive of a lot of fat.

By the way, not to be a hypocrite or anything, I love fat.  I just don't love what it does to my thighs.

This puree is weird, it's smelly, but it works.

Cut up an onion, 9 cloves of garlic (ordinarily I use minced garlic because I always have that on hand), and 1/2 cup of water.  Place in a microwave safe bowl.


Here is where it gets a little strange, but I promise, well worth it.

Cover the bowl with plastic wrap and microwave for 10 minutes.


I never let mine go the total 10 minutes because of what starts to happen to the plastic wrap.

After it is done cooking in the microwave it should look something like this:


Next, blend it all together.  You can use whatever kitchen machinery you prefer to do this.  My preference is my immersion blender.

I absolutely love my immersion blender.  My life is complete now because of it.  I make the most delicious mashed potatoes with it, the smoothest smoothies, and this fabulous onion-garlic puree.


I'm planning to do a giveaway eventually of an immersion blender.  That's how much I love them.  Every kitchen in America should have one.


The onion-garlic puree can be made ahead of time and refrigerated.  I never do this, but I should because for as much as I love it, it is quite a process mixed in with the other steps of this recipe.

Start the recipe by boiling water.  This next step I added.  I recognize that it makes this 'healthy' mac and cheese a little less 'healthy' in a health nut's standards, but for me it makes it perfect (and without adding too many extra calories).

Fry some bacon.  I try to only fry four to six pieces.  Four for the mac and cheese, and two for me to nibble on.


Bacon.  The soul reason I could never be a vegetarian.


I ask you, is there a more enticing sight?

The answer is no.


If you're trying to be outrageously healthy, use whole wheat pasta.  I tend to hate whole wheat pasta because it tastes like cardboard rather than the glorious complex carbohydrate that it should be.

So sometimes I'll use the good stuff that wasn't too unhealthy in my grandma's day.

After the pasta is done cooking, using the same pot that the pasta was cooked in (because it's all about less dishes at the end of the night, right?) simmer the onion-garlic puree with 1/2 tsp of dry mustard and a pinch of cayenne pepper.


Once combined, add one cup of shredded cheddar.  Wait a minute, this is healthy mac and cheese and all so make sure it is reduced-fat cheddar.

But I won't tell if you let some of the good stuff slip in though.

It'll be our secret.


When the consistency looks like this:


remove the pot from the heat.  Whisk in 1/3 cup of nonfat yogurt.

The recipe says to use the 'Greek' stuff, but any ole nonfat yogurt will work.


Once the sauce has reached a smooth consistency, toss the macaroni into the pot with the sauce.

*Note: If you've noticed that my pot changed, you would be right.  It has taken me several makings of this recipe to finally have pictures for the most important steps.  I wouldn't be able to sleep at night if I left out the mixing of yogurt and cheese.  You understand, I'm sure.


Mix the macaroni and the sauce together until the macaroni is well coated.


You have two choices of what to do with your bacon.  What I do completely depends on my mood.  Sometimes, I'll mix it in with the macaroni and cheese.  Other times, I will pour half of the mac and cheese into the dish, top it with half of the bacon, then repeat.


Either way it will all flow together into a beautiful combination kissed from the angels in heaven above.

Pour the mixture into a baking dish that you already sprayed with nonstick cooking spray.  (See again, healthy.  Most mac and cheese recipes will tell you to rub the dish down with, gasp, butter!)

Again, let me reiterate, butter is my friend.

I love butter.


Sprinkle a handful of Panko crumbs over the top, if you're into that sort of thing.  I find that it adds the perfect subtle crunch to the final product.


Then, sprinkle 1/4 cup of grated Parmesan cheese.  I highly recommend using freshly grated Parmesan.  It is incredible.  Please, promise me you won't use the stuff that Kraft has pre-grated for you.  It is not the same.

P.S.  There is a time and place for everything.  I love my grated Parmesan cheese, but it does not belong on top of my mac and cheese.


Bake for 10-15 minutes at 425.

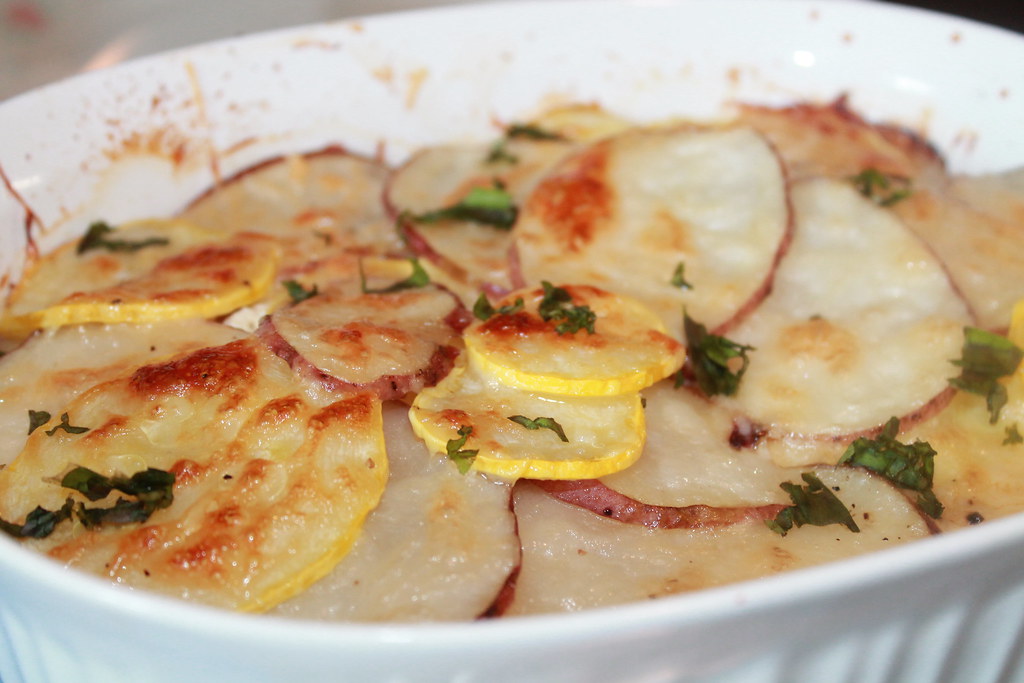
Oh my goodness.  It is the baked ziti of mac and cheeses!


This recipe makes four servings, a serving weighs in at 438 calories.  Put a little greens on your plate and you can feel content that you've eaten dinner for under 500 calories.

That is, so long as you only have one serving.


Which, tonight, I found it extremely hard to do.


Sunday, July 29, 2012

Three Cheese Crock-Pot Ziti

Recipe: Crock-Pot Ziti
Source: The Orange Strainer 
Time: 4 hours and 15 minutes total
Ease: 1
Taste: 7
Leftover Value: 5
Down the Drain or Keep it in the Strainer: Keep it in the Strainer!

By now you know that I love my crock-pot.  After all, what's not to love about something you can toss a bunch of ingredients into, walk away from for a few hours, and upon your return be greeted with a fully cooked meal ready to be devoured?

I can't think of anything better.

My mom's friend gave her a recipe for crock-pot baked ziti.  We improvised it a little, and this is what we came up with.


Ingredients:

15 oz Ricotta cheese
16 oz Mozzarella cheese
1 cup Parmesan cheese
1 box (16 oz) ziti
2 (26 oz) spaghetti sauce (any kind)


Start by tossing your mozzarella into a big bowl.  Don't be like me and forget to thaw your frozen mozzarella and then realize that your mozzarella is so frozen it is more like mozzarella ice cubes that refuse to be chipped away at.

Warning to the wise.  Thaw the night before or use fresh mozzarella.  Fresh mozzarella makes it more authentic, I guarantee.


Add a cup of Parmesan.


And 15 ounces of ricotta cheese.


Mix the three cheeses together so they are combined and you have a bowl full of white clumpy clouds.

Yum.  I probably could have just thrown this in the crock-pot and been completely satisfied.

Mental note to self....definitely, do that.


Take one of your cans of sauce and spread a light coating of it in the bottom of the crock-pot.


Add half of the uncooked* ziti noodles.

*Let me stress the word 'uncooked' here.  That's right.  No waiting for water to boil.  No waiting for the noodles to become al dente.  Just toss those bad boys raw style into the crock-pot.

Think of all that time I just saved you!**

That's about 30 minutes of YOU time!  Go read a book, do your nails, wash the dishes.

**Hint: This works really well with lasagna noodles too.  So, instead of calling this baked ziti, throw lasagna in and you have the easiest lasagna ever, I promise.  


Cover the noodles with the remaining sauce from can #1.  Toss the noodles so they are coated with sauce.


Spread half of the cheese mixture on top of the noodles.  This basically consists of plopping small spoonfuls all over.  This way the cheese will spread out as it melts and form a cheesy blanket on top of the noodles.

I just love cheesy blankets.


If you're feeling a little artistic, as I was, drizzle a little sauce from can #2 on top of the cheese layer.


Then cover the cheese with the rest of the noodles.


Cover the noodles with the remaining sauce.


As done previously, toss the noodles in the sauce.  For this layer of noodles you especially want to make sure that there aren't any unsauced noodles remaining.  That's right, I made up a word: unsauced.

Live with it.

If you have noodles that are unsauced they tend to not cook very well and become so hard that I'm sure they could be considered a lethal weapon....for your teeth that is.


Cover the saucy noodles with the remaining cheese.


Set the crock-pot to LOW for four hours.  Walk away and enjoy your life.

Or, set the crock-pot to HIGH for two hours.  Again, walk away and enjoy your life.  Watch a movie, write a poem, go for a walk.

Or blog.


I'm sorry, I'm not sure there is anything more beautiful than cheese, sauce, and noodles.

If there is, don't tell me.  I don't want to spoil this moment.


If serving to a large crowd, make sure you get one of the first servings.  That way you can get the best cheese choice possible.  The beauty of this recipe is that the biggest glob pictured here was the cheese sitting on top.  But, the middle layer of cheese is seen in the background.  That middle layer melted nicely into the bottom layer of noodles creating a mixture no man or woman could do on their on.

But the crock-pot set on LOW for four hours could do it magically.