Showing posts with label brownies. Show all posts

Tuesday, October 28, 2014

Recipe #9: Mocha Brownies

Recipe: Mocha Brownies
Source: The Pioneer Woman Cooks
Time: 1 hr plus time for brownies to cool and icing to set
Ease: 2
Taste: 5
Leftover Value: 6
Down the Drain or Keep in the Strainer: Down the Drain.

IMG_0512


These brownies are obnoxious.  I'm just going to call them like they are.  They are monsters.

I knew these brownies were over the top.  I made them several years ago and heeded PW's warning that the icing was a lot---so I halved it.  The brownies were good, the icing was good, but together it seemed like overkill.  Also, the brownies were extremely crumbly--perhaps this is why the last step is to refrigerate them.

Since this time I couldn't make any changes, I decided I needed to make the icing as directed.

IMG_0514


Only, as you can probably tell from the picture, I forgot the last part about refrigerating them.

Either way, with icing that has hardened or icing that is still creamy smooth, this will be the last time I make these brownies.  At least in this way.

There are far too many brownie recipes out there that I love for me to make brownies that I'm just okay with.

IF you are into icing, and IF you like a thick brownie, then this is for you.

Should I choose to make these again, I would change two things.

1. Instead of baking them in an 8-inch square baking dish, I would use a 9 x 13 dish.

Aside from the brownies themselves being ridiculously thick, one of the major issues I had with their size was not being sure that they were done.  I know brownies are the sort of thing that can be a little underdone, but because of their thickness, I didn't want to be serving chocolate mush as dessert.

2. I would alternate between halving the icing and simply making the brownies without it at all.

The icing was delicious (and if you have any family members who wrinkle their nose to coffee flavoring, milk could be substituted for the coffee), but because of the richness of the brownies, I feel like the icing was out of place.

IMG_0523

Wednesday, October 15, 2014

The I'm-Being-Good Brownie

Recipe: Dark Chocolate Whole-Wheat Brownies
Source: 100 Days of Real Food
Time: 30 minutes
Ease: 2
Taste: 4 
Leftover Value: 8
Down the Drain or Keep in the Strainer: Down the Drain

IMG_0284

Here is my point of view on making substitutions for wonderful things like white sugar, white flour, butter, and eggs: If it works, let's do it!*  I've said time and time again my feelings on whole-wheat flour and how anymore it simply is not allowed in my kitchen.  However, I'm still debating my stance on white whole-wheat flour.  It's not quite as cardboard-like as your regular whole-wheat flour, however, it isn't exactly as smooth and inviting as good ole' unbleached white flour.  

*And of course, if your health dictates that you can't have these things, then of course, make substitutions!!

I've substituted applesauce for eggs, black beans for butter, and I've even half and halved my flours to incorporate some of the good stuff.  In the end, in my humble unprofessional opinion, there is no perfect substitute for the basics in the traditional world of baking.

With that said, enter Dark Chocolate Whole-Wheat Brownies.

IMG_0238

I sensed these brownies were not going to be perfection, but I wanted my guilty conscience to feel better about the continual snacking that I do.  These brownies use white whole-wheat flour, coconut oil, and offer a choice between honey or maple syrup.  I thought the maple syrup would be too... mapley...so I used honey the first go 'round.

When I started mixing I ran into an issue with an ingredient in the ingredient list: 1 to 2 eggs.

What is that supposed to mean?  Shouldn't the recipe's creator have known what is best regarding the number of eggs?

I knew from the hundreds of times that I have punked out and made boxed brownies that the difference in the numbers of eggs used will be the difference between a fudgey vs cakey brownie.  Because of the high amount of coconut oil and honey (1/2 cup each!) I thought a more cakey brownie would better spread those flavors.

I was wrong.  That extra egg made the brownies the densest, driest, blandest brownies of my entire existence.

IMG_0246

Not to be outdone by a simple brownie, I decided to make them again, this time with only one egg and maple syrup instead of honey.  In the first version, not only had they been drier than the dessert sands, the honey flavor overpowered the brownie, even more so than the flavor of chocolate.

IMG_0278

With the maple syrup and one egg they came out to have a better consistency, but it was still not a fudgey brownie.  The flavor throughout was much more enjoyable, but ultimately they were still rather dry and unexciting.  I suppose if you were on a strict diet and couldn't eat traditional brownies these would certainly work to feed the craving.  Since that does not exist in my life, I'm letting these bad boys go down the drain.*

One positive about them was that they were super easy to cut into squares.  I'm sure you've experienced cutting brownies and having their edges move with your knife as you attempt to slice a line down the pan.  These brownies stayed put, allowing me to make a beautifully clean cut each time.

IMG_0283

*Note: My sister-in-law, Mallory, who is currently on a major health kick (she lost over 20 pounds using My Fitness Pal**) loved these brownies.  Of course, she has cut a lot of unhealthy fats and processed foods out of her diet so her tastes I'm sure have changed a little thanks to her healthier lifestyle.  That said, don't expect to be in chocolate heaven with these.

**My Fitness Pal is pretty much my favorite app for tracking my daily calories.  If you are looking to lose weight it is a fabulous way to hold yourself accountable and to see results.

Friday, September 5, 2014

Brownie on a Stick, Anyone?

I have always taken issue with creating desserts that are masterpieces of beauty only for them to be demolished in less than 60 seconds.  That might be why I have never been into cake making.  Seeing what other people can do with cakes amazes me.  But I know my reality.  My patience in creating a piece of edible artwork only lasts so long and my logical reasoning would be saying to me the entire time, "This is a waste of time!  People will ooh and aah at this for ten minutes and then in seconds destroy what took hours to create."

Or worse.  They won't want to eat it at all because it, "Looks too pretty to eat".

When unique presentation can be given to food almost effortlessly, then I'm in.

IMG_5569

Enter Brownies-on-a-Stick.

I got the idea for these while flipping through one of the many different cooking magazines that I dream of subscribing to (I already have a stack of recipes that I want to make and haven't made yet, could you imagine if I had four different food magazine subscriptions coming to my house monthly?).

I participated in the cake pop fad and after making them three different times I realized what a waste of time they were.  One batch of cake pops took me a minimum of three hours to make.  That's not counting making the cake and waiting for it to cool so that it could be shredded, mixed with icing, and then rolled into cake pop insides.

These Brownies-on-a-Stick give the same kind of Ohmygoodness-you-made-that? presentation as cake pops, but save you oh so much time.

Here's all you need to do:

1.  Make your favorite non-gooey brownie recipe.  You want a thicker, more cake-like brownie that doesn't have major crumbling issues.

2.  Allow the brownies to cool completely.  Throwing them in the fridge for a few hours will help to give a clean cut.

3.  Slice the brownies into 2 x 2 squares.  The ones that are pictured are a little bigger than this and I suffered because of it.  Any larger and you risk them being too heavy for the stick.

4.  Push a Popsicle stick into the thickest part of the brownie--make sure it doesn't go through the top.

5.  Melt some chocolate.

6.  Dip the top half (or the whole thing, why not!) of the brownie into the chocolate.

7.  Dip it immediately into the topping of choice--make sure to cover the top and sides, too!

8.  Allow chocolate to harden.  This takes several hours.  If you have space, put the brownies in your fridge to speed up the process.

Topping ideas: sprinkles, chocolate chips, toffee pieces, cookie crumbs, coconut, mini m&ms, crushed nuts, rice krispies

When the chocolate has hardened, lay the brownies out on your favorite tray in a cute pattern and serve.  Cute, delicious, and super easy.  How can you not love Brownies-on-a-Stick??

IMG_5577
 

Tuesday, May 14, 2013

Office Pranks and Mini Trifles

My husband is the closest thing to Jim Halpert that I know.

In case you don't know Jim, he's a character from the show "The Office".  Jim plays harmless office pranks on his coworker, Dwight Schrute.  A few of my favorites have included when Jim tricked Dwight as to what day of the week it truly was, when he hid his cell phone in the ceiling tiles, and when he put his stapler in a jello mold.

Hubby's Dwight Schrute is his coworker Drew.  Because I'd like to keep my relationship with hubby the way it currently is, I think I am legally bound to not go into details on the things he has done in office fun to Drew. 

However, I will say that he may or may not have moved Drew's car from the office parking lot to the gym parking lot across the street.

But again, he may or may not have done that, I'm not at liberty to honestly say.

Occasionally, an office prank can get foiled against the plotter.

What a sad day that is.

Drew is a co-member of the two person party planning committee at the office.  Each month they plan a celebration with desserts to commemorate the birthdays of that month.  May, being hubby's birthday month, caused hubby to stress to Drew that he wanted to pick the dessert item since in years past he had been overlooked.

He told Drew he wanted trifles for the dessert.  "Trifles?" asked Drew.  "Where am I gonna get trifles?"

"Not my problem, just do it," said Lance.  "Oh, and I want them to be mini," he added.

Drew, knowing that I make a delicious chocolate trifle, then suggested that I make them.  

This led to Drew approaching me on Wednesday to ask me if I could make trifles for the following Monday.  Monday, as in five days later Monday.  Trifles, as in mini trifles.  Enough for 70 people.

Not exactly what hubby's secret plan had been.  

The secret plan was to cause Drew to have to search the earth high and low for a bakery, supermarket, restaurant, or roadside stand that makes trifles.

And while I don't really mind making desserts, in the end, it was hubby who truly suffered.  First, by partaking in ingredient shopping Friday night with Drew and me.  Then by being forced to participate in five hours of trifle making Saturday evening.

It was quite the event, but lets look at where it all began:


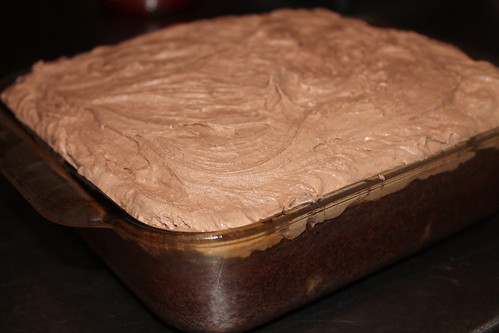
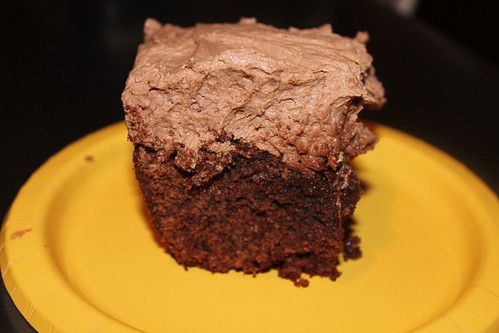
The Chocolate Trifle

Deliciously decadent, first made for my dad on his birthday.

Which was soon followed by the creation of:


The Strawberry Shortcake Trifle

Sugary sweet, made first for my soon-to-be sister-in-law's birthday.

The mini trifles had a somewhat less romantic beginning and it looks like this:


As I was gathering the necessary supplies, I had a mixture of panic and excitement for making one of my favorite desserts for so many people.

Panic because, oh-my-goodness, I was making dessert for 70 people.
Excitement because, oh-my-goodness, I was making dessert for 70 people.

It would've been one thing if this dessert was something like cookies or cake.

But trifles?

There is a true art to compiling them.


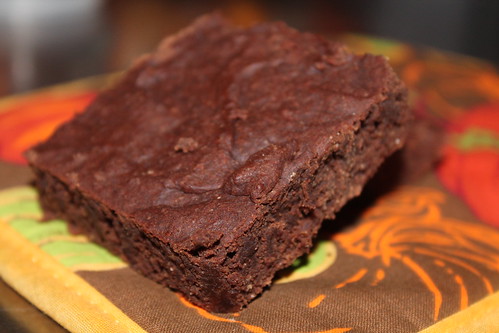
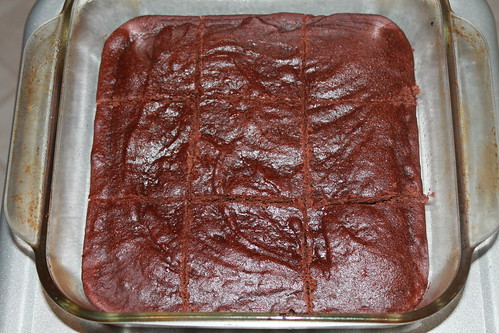
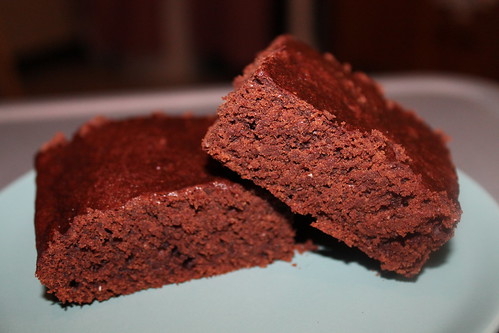
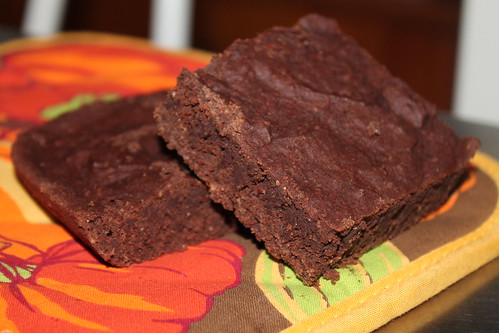
Three batches of brownies,


and two yellow cakes later and I was ready to start the long process of building the perfect mini trifle factory in my kitchen.

I'm going to be honest.  It was a rather chaotic time that I'm sure will come back to haunt me in my sleep.  Because of this, I lost my sanity and usual drive to snap pictures along every step of the way.

You're lucky I was able to capture this moment:


The chocolate trifles were done first and moved pretty smoothly.  Drew came over and helped me put the cups together while hubby wrapped them in plastic wrap and found room for them in the fridge.

He also did a few dishes.

But then again, so did I.

The craziness pictured above came from the strawberry (and blueberry!) trifles.  Drew found that process to be a bit too creative and after putting together a few cups, he decided it was best if he just watched.

Five hours from go time, my refrigerator was stockpiled with mini trifles for an army.


Chocolate trifles,


and strawberry shortcake trifles, oh my!

Note: Please don't point out that I didn't have a third thing mentioned here as in, "Lions (1) and tigers (2) and bears (3), oh my!"  Sometimes one forces something that doesn't work to work.  As I just did.

Please forgive me.


When it was coming down to the end and I still had a monster load of yellow cake, but no mousse left, I got creative and used a little of the chocolate mousse that I had extra of and created a whole new beast of a trifle.

The Strawberry Shortcake with Chocolate Mousse Trifle....With Blue Berries, too!

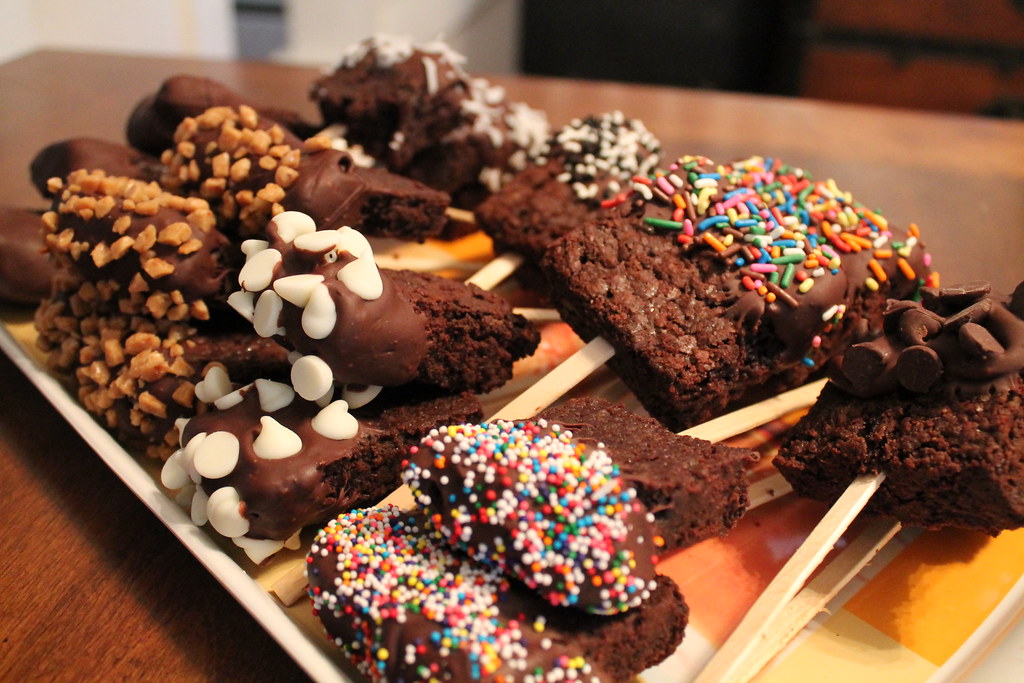
Hubby was sweet enough to snap a few pictures in the morning when he loaded them up to take in to work.


I was especially thrilled to find the following pictures texted to me later in the day:


It's amazing how creative hubby can be when he puts his mind to it.

The mini trifles were a complete hit in the office.  I received appreciation in the form of phone calls, emails sent to hubby, sonnets written in my name, proposals, and first born children named for me.

That's what trifles can do to you.

They're that good.


Saturday, July 28, 2012

A Day of Frosting

Recipe: The Best Chocolate Buttercream Frosting
(Spell check insists that buttercream is not one word, however, my cookbook opposes.  Sorry spell check, the cookbook wins).
http://joythebaker.com/2008/06/the-best-chocolate-buttercream-frosting/
*Recipe in the book is cut in half.  It makes PLENTY.
Source: Joy the Baker Cookbook
Time: 15 minutes
Ease: 2
Taste: 10
Leftover Value: 10
Down the Drain or Keep in the Strainer: Keep it in the Strainer!

I made my two desserts for today's birthday party yesterday.  Somehow, and I have no idea why, I ran out of time yesterday. (I can't imagine how that's possible when there are 24 whole hours in one day).  That left the hour before the party, the hour that I had only about a dozen other things to do as well, to make two kinds of frosting and frost two different desserts.

I'm going to work backwards and tell you about the frosting I made second.  That would be the peanut butter cream cheese frosting that I made for the peanut butter birthday cake.  (Both are recipes from Joy the Baker Cookbook).  I'm not sure why I have never eaten peanut butter in this form before, but I think I am now committed to this relationship.  I can see it now, peanut butter cream cheese frosting on apples, bagels, bananas, oatmeal.  That's right, oatmeal, why not?


This frosting's presence is so very deceiving.  It looks like any typical, ordinary frosting.  But dip your finger in here and sparks will fly.

You've been warned.

I'm not responsible for what happens.


This being my second time making this frosting, I decided to actually follow the end direction of the recipe and mix in two tablespoons of peanut butter before frosting my cake.  It gave the frosting an extra punch of the beautiful salty flavor that is peanut butter.  (Reminder: salty-peanut butter plus sweet-cream cheese always breeds success).

I made the peanut butter frosting second because the chocolate frosting was new to me, so I wanted to do make it first.

And I was worried about my dish washing skills and didn't want to leave any peanut butter flavor in my mixer bowl to confuse the chocolate flavor I planned to create.

I know, I'm weird.


From the start of making this frosting I wanted so badly to dip my finger in and test taste.  You might be thinking, why not?  Go for it.  Every cook needs to test the flavor as they go along.

The problem is, this picture is not of the first step.  See on the paddle how there is a darker chocolate color? That was what the first step of this frosting process looked like.  And that is what I so badly wanted to dip my finger into, then fill a bowl with and declare it to be my lunch.

The problem is, that when the frosting was at that dark chocolate stage it consisted of three things: salt, cocoa powder, and butter.

And I bet I would have loved it tremendously.

So would my thighs.


The secret ingredient to this icing is a mixture of Ovaltine powder and heavy cream.  I know, I had my doubts too.  Especially when I walked through about five different aisles of Acme searching for the Ovaltine.  I wanted to ask an employee for help, but all I could think to say was, "More Ovaltine please!".

Sorry, that radio commerical is embedded in my mind probably forever.

I was a little rebellious with this recipe though.  It called for two and a half to three cups of powdered sugar, sifted.  

I didn't sift the powdered sugar, and I only used two cups.

Whew!  Glad I got that off my chest.


Not to worry, the frosting still came out incredible as is seen here by my lovely brownies from the previous night which have been crowned in globs of frosting.


Now I have a serious question for you.  Is it frosting or icing?  I've always called it icing until every single recipe I've used called it frosting.  So I felt a little silly typing icing for a recipe called frosting.

I'm pretty sure they are the same thing.  Maybe it's a regional difference.  Like pop and soda?

We call it soda here.


I call this picture, "An Army of Brownies Iced, no wait, Frosted"


Friday, July 27, 2012

I Love Brownies

Recipe: Chocolate Fudge Brownies
Source: Joy the Baker Cookbook
Time: 50 minutes total
Ease: 2
Taste: 8
Leftover Value: 10
Down the Drain or Keep in the Strainer: Keep it in the Strainer!

My littlest brother, Jonathan, is turning 20 tomorrow.  I think that makes me feel really old.  Even older than I felt when I turned 26.

When he saw the delicious peanut butter cake I made for my brother Joel's birthday he told me he wanted one for his birthday.

Then, he also demanded brownies.

Who wouldn't demand brownies if they knew they could get them?

Therefore, I made brownies.  Of course, only after I made the peanut butter cake.


 Brownies make life better.  Chocolate makes life better.  These brownies, certainly, made my life better.  (And, truth be told, I have one last step yet to add to them--chocolate butter cream frosting.  I promise, I'll post about that later!)


The brownies required three ounces of unsweetened chocolate.  I always forget how the not sweet taste of unsweetened chocolate makes my mouth shake repulsively.

But, after mixing the chocolate with some butter and other essential ingredients, I was ready to lick the bowl clean.

P.S. Those lumps you see, yeah, they're chocolate chips.  Chocolate with chocolate, is there anything better?


This recipe was ridiculously easy.  It called for the brownies to bake for 25-30 minutes, but mine needed to go a little longer.  I honestly wanted to take them out around 25 minutes and serve gooey chocolate bars instead of brownies at the birthday party, but I took into consideration the feelings of others.

Although, I can't believe there are people out there who don't like gooey brownies!


These brownies make me want Christmas.  I'm not sure why.

I'd settle for a cup of hot cocoa with it though...