Recipe: Cake Pops
Source: The Orange Strainer
Time: 3+ hours, it helps to break the process up across two days
Ease: 10
Taste: 10
Leftover Value: 10
Down the Drain or Keep in the Strainer: Keep it in the Strainer!
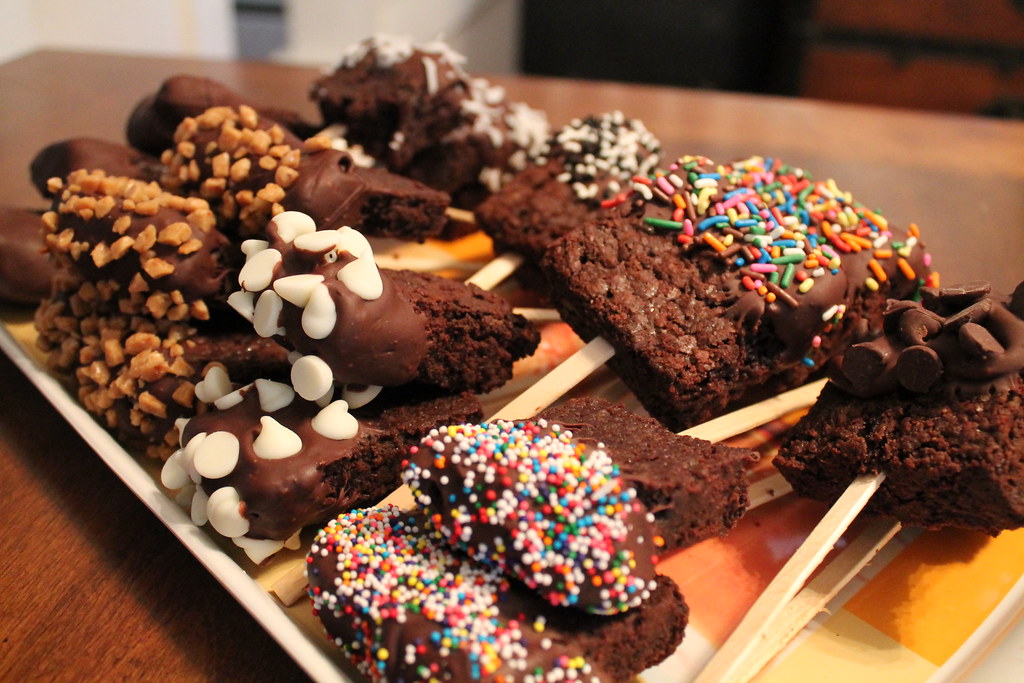
This is a glorious sight.
Whenever I begin to make cake pops, music suddenly starts playing and I hear, "Come with me, and you'll be, in a world of pure imagination..."
If you're a Charlie and the Chocolate Factory fan, you'll appreciate that.
Cake pops are as hard to make as they are delicious. Despite knowing that, I have made them three times so far this summer and after the third time, I know it must be love.
The steps are actually simple. It is the time consuming-ness of the steps that makes making cake pops something that most women run from screaming until they have reached the safety of their mother's arms.
After looking up a wide variety of cake pop recipes, I realized the extent of the cake pop concept boils down to two things: cake and icing.
Start by baking a simple cake. Don't get fancy here. You'll need to reserve your strength for later.
This means, use a cake mix! For the love of everything holy, use a cake mix!
Because after your beautiful cake is is baked, you will destroy it into tiny crumbles as pictured above.
Grab a container of store bought icing.
Yes, again, store bought! Don't get fancy here. You don't have the time!
Heat the icing up for 10-15 seconds. (Make sure you've peeled off all the foil that lines the rim, or you might not be making cake pops but buying a new microwave instead).
Mix the icing in with the cake crumbs until the crumbs are moistened enough to be rolled into balls. Every time I've made this I've used a different amount of icing. With the cream cheese icing pictured above, I only used half the container. The last time I made them, I used the entire container.
This is the consistency you want.
You can see my fist print pretty well here. But I swear, I was happy when I was making these!
The ball should be able to be rolled with ease and not break apart.
This part of the process should remind you of making meatballs, except with this you can eat bits of the mixture as you go along...yum!
Part one of the waste of time that is cake pops: the rolled balls need to go into the freezer for at least 30 minutes. The most recent time I made these, I put them in the freezer for an hour and I think they were much easier to work with that way. But, if you're impatient like I usually am, 30 minutes will work too.
While they are in the freezer, begin to melt the chocolate that you plan to dip them in. Any chocolate will do. I've been using semi-sweet chocolate chips. The best way to go about this is to use a small crock pot. The chocolate stays warm while the whole dipping process occurs. No need to worry about reheating as you go along.

This little guy is amazing. I got him with a larger crock-pot that I received for my bridal shower two hundred years ago. He is the perfect size for cake popping.
Pop some sticks in the cake balls. The special variety 'cake pop sticks' are nice, but you certainly don't need to use them. My first time I made cake pops hubby gave me some leftover craft sticks and they worked just fine.
Once your cake pops are assembled, put 8-10 of them on a separate plate and put the others back into the freezer to stay cold.
This chocolate is just about ready.
The dipping process is crazy. I've never made chocolate dipped anything before I made cake pops, so it was quite a learning experience. If I could have taken step by step pictures of this process to help you out, I would have. But then my camera would be a chocolatized mess.
Here's how it basically went:
1. Dip top of cake pop into the warm chocolate.
2. Swirl cake pop around in the chocolate for a little, but not too long or else the ball will become loose from the stick.
3. Take the cake pop out of the chocolate with one hand, in the other hand hold a spoon with a little chocolate on it. Gently roll the cake pop in the chocolate until completely covered.
4. Top with sprinkles.
5. Set aside to cool.
Well, that's how it went on a good try.
By my third round of cake pops, I was a pro at dipping them. I still would have needed a third hand to be able to photograph the process.
The orange strainer, live and in living color!
Don't waste money buying Styrofoam blocks. A strainer will work perfectly to let each pop individually cool.
To the left you will see I got a little adventurous and made marshmallow pops. Yum! Freeze marshmallows on sticks for about 10 minutes. Dip in chocolate. Top with crushed graham crackers. You'll thank me later that you did.
After the cake pops are covered in chocolate goodness, do what you can to relocate them to the refrigerator. The chocolate will harden much better there and within an hour or so you will be able to place them on a serving dish, or in my case, serving basket.
So far, the best cake pops I've made were a devil's food cake mix mixed with chocolate icing. The thing to keep in mind is that one cake pop is, in most cases, more than enough. They are moist, heavy, and rich, something those who haven't yet experienced cake pops won't expect at first. While most people love the cake pop craze, don't be offended if it's not everybody's taste.*
*I add this note because, of all people, Hubby has a thing against cake pops. This is my life people.