Showing posts with label ricotta cheese. Show all posts

Saturday, December 20, 2014

Recipe #49: Lasagna

IMG_1607

Recipe: Lasagna
Source: The Pioneer Woman Cooks
Time: 2 hrs 10 min
Ease: 7
Taste: 7
Leftover Value: 5
Down the Drain or Keep in the Strainer: Keep it in the Strainer!

I have been afraid of lasagna for a long time.

It intimidated me.

It haunted me.

My mother makes great lasagna and she is constantly perfecting her recipe.  She also is the one who reminds me when I think I'm going to make lasagna on a whim that it is an ordeal.

Ugh.  Who was the mother who coined the phrase, "Mother knows best"?

Because she was so right.

Note to self: Lasagna is not a meal to make when you are starving.  Lasagna is not a meal to make if you are in a hurry.  Lasagna is not a meal to make if you are impatient.

Perhaps this is why I have waited so long to make it.

Naturally, I chose to make it on a night where I was starving, in a hurry, and feeling rather impatient.

IMG_1598

Thankfully, I had a cute cooking companion who was not one of those things.

IMG_1599

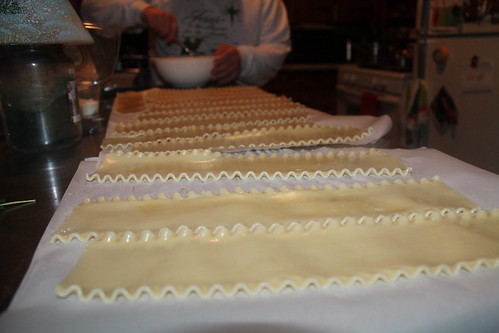
The recipe calls for 10 oz of lasagna noodles--which somehow ended up being more than necessary.  In reality, it should have called for eight lasagna noodles.  This worked out in the end for me though because Hubby has a complete aversion to cottage cheese.  Originally, I wasn't going to cater to this picky nature---especially since cottage and/or ricotta cheese are essentials to true Italian lasagna. Despite this, I decided the extra noodles could be used to make him a mini lasagna made with only mozzarella and Parmesan cheese.
IMG_1601

Here's something stupid that has happened several times to me during this recipe challenge (and let's be honest, during several of my cooking adventures over the past seven years): I forget to plan out how long certain things need to cook.

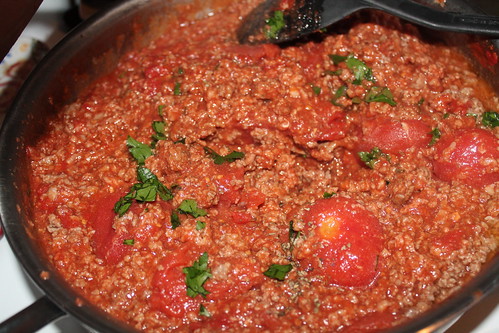
Such as the meat, seasonings, and tomato mixture that need to simmer for 45 minutes.

45 minutes!  

When you are hungry, 45 minutes is an eternity.
IMG_1605

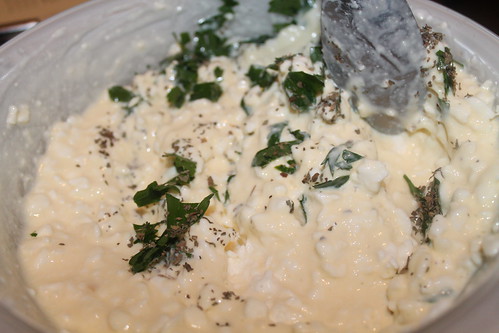
I tried to bide my time by prepping every other aspect of the lasagna including readying the pan and the cheese mixture.
IMG_1603

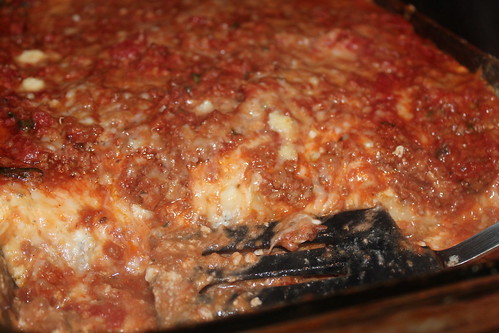
But then, of course, once the lasagna was assembled it needed to cook for 35 to 45 minutes.
IMG_1606

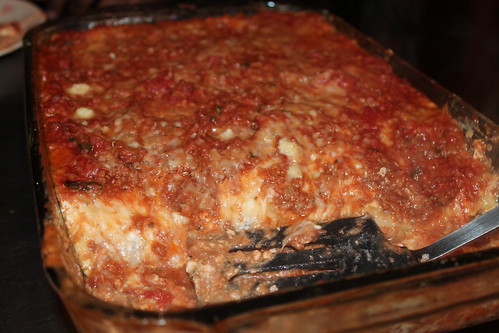
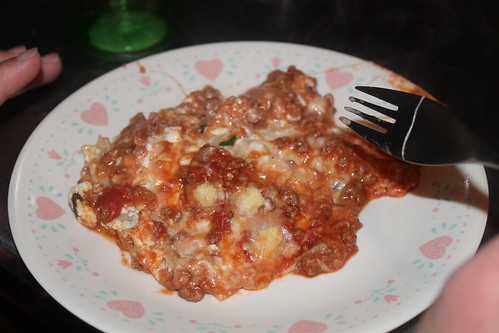
Impatience won out after the lasagna was finished cooking. As with most hot and potentially soupy items, lasagna should, and PW directs to let it, sit for 10 minutes before slicing.

I waited about 10 seconds.

Can you tell?
IMG_1608

Regardless, the flavors were delicious.  The meat mixture was perfect...did I mention that I wanted to eat it with a spoon from the pan as it was cooking? It smelled divine.

The only change I would make is to add ricotta cheese to the mix.  Ricotta is amazing and completely necessary in lasagna.  

No matter what Hubby says.

IMG_1609

Wednesday, February 13, 2013

Easy Cannoli Cream

Recipe: Mini Cannoli Cream Cups
Time: 40 minutes
Ease: 5
Taste: 8
Leftover Value: 8 
*For the first day only.  It won't keep for much longer as cream gets watery and shells get soggy.
Down the Drain or Keep it in the Strainer: Keep it in the Strainer!


Cannoli have always been an untouchable dessert for me.  They are one of my favorite desserts of all time, but intimidate me like crazy.  Then I found this recipe that made them not so scary, and actually, a little healthier.

Just a little.  Too much would be no good.


We start with ricotta cheese which God created to make the world a better place.  The recipe suggests staining the ricotta in cheese cloth over night to remove excess water in the cheese.  This helps to make the cheese mixture thicker.

Patience is not one of my major virtues in the kitchen.  So instead of the whole overnight procedure, I just dumped my ricotta into a bowl I lined with paper towels.  I pressed the paper towels into the ricotta lightly to get rid of any moisture left from it sitting in its container.


The cream is as simple as: ricotta, powdered sugar, white sugar, and vanilla.  The recipe says to wait and sprinkle the mini chocolate chips on top of the final product, but I wanted my cannoli bites to be pretty authentic.  Nothing is better than cannoli with loads of chocolate chips mixed right into the cheese.

After this mixture is made it goes into the fridge to firm up for as long as it takes you to make the crusts.


The shells make this recipe a little healthier than typical cannoli.  Ordinarily, cannoli are made up of the cheese mixture and a shell which has been formed into a tube and fried.

If I'm being completely honest, my heart really longs for those kinds of cannoli.

In my own home cooking though, these are a fair trade.

Sprinkle a little sugar on top of a rolled out refrigerated pie crust.


Sprinkle a little cinnamon.


Swirl the sugar and cinnamon around with your hand.  Spread it out all over the surface of the pie crust.

If you are unlike me and can plan ahead, mix the sugar and cinnamon together in a bowl so that you only have to sprinkle once.

Yes, that sounds like a much smarter option.


After you've either sprinkled sugar then cinnamon, or sprinkled a cinnamon sugar mixture, use a rolling pin to lightly press the mixture into the crust.


Now cut out your mini pie crusts.  Using a circular cookie cutter, a biscuit cutter, or a cup of a little under 3 inches wide make circles close together in the pie crust. 


Press each circle into an ungreased mini muffin pan.


You can press the corners down perfectly if you want.  Clearly, I did not.  I call it an artistic flair.


You'll be left with a lot of extra pie crust.  Don't throw it away!  Pack it firmly in a ball.


And roll it out to make some more crusts.  One pie crust should yield between 16-18 mini pie crusts total.


They are so pretty!  The cinnamon sugar mixture is the perfect bit of flavor, leaving them still a healthier option than deep fried shells.


To fill the cannoli cups, put the cannoli cream into a gallon size ziploc bag.  Cut off one of the bottom corners and use it as a pastry bag to fill each cup.  Then sprinkle mini chocolate chips on top of each cup.


These were so close to the real thing that I think I went into shock over the fact that I had made them.  They work as a perfect substitute for the real thing.


Sunday, July 29, 2012

Three Cheese Crock-Pot Ziti

Recipe: Crock-Pot Ziti
Source: The Orange Strainer 
Time: 4 hours and 15 minutes total
Ease: 1
Taste: 7
Leftover Value: 5
Down the Drain or Keep it in the Strainer: Keep it in the Strainer!

By now you know that I love my crock-pot.  After all, what's not to love about something you can toss a bunch of ingredients into, walk away from for a few hours, and upon your return be greeted with a fully cooked meal ready to be devoured?

I can't think of anything better.

My mom's friend gave her a recipe for crock-pot baked ziti.  We improvised it a little, and this is what we came up with.


Ingredients:

15 oz Ricotta cheese
16 oz Mozzarella cheese
1 cup Parmesan cheese
1 box (16 oz) ziti
2 (26 oz) spaghetti sauce (any kind)


Start by tossing your mozzarella into a big bowl.  Don't be like me and forget to thaw your frozen mozzarella and then realize that your mozzarella is so frozen it is more like mozzarella ice cubes that refuse to be chipped away at.

Warning to the wise.  Thaw the night before or use fresh mozzarella.  Fresh mozzarella makes it more authentic, I guarantee.


Add a cup of Parmesan.


And 15 ounces of ricotta cheese.


Mix the three cheeses together so they are combined and you have a bowl full of white clumpy clouds.

Yum.  I probably could have just thrown this in the crock-pot and been completely satisfied.

Mental note to self....definitely, do that.


Take one of your cans of sauce and spread a light coating of it in the bottom of the crock-pot.


Add half of the uncooked* ziti noodles.

*Let me stress the word 'uncooked' here.  That's right.  No waiting for water to boil.  No waiting for the noodles to become al dente.  Just toss those bad boys raw style into the crock-pot.

Think of all that time I just saved you!**

That's about 30 minutes of YOU time!  Go read a book, do your nails, wash the dishes.

**Hint: This works really well with lasagna noodles too.  So, instead of calling this baked ziti, throw lasagna in and you have the easiest lasagna ever, I promise.  


Cover the noodles with the remaining sauce from can #1.  Toss the noodles so they are coated with sauce.


Spread half of the cheese mixture on top of the noodles.  This basically consists of plopping small spoonfuls all over.  This way the cheese will spread out as it melts and form a cheesy blanket on top of the noodles.

I just love cheesy blankets.


If you're feeling a little artistic, as I was, drizzle a little sauce from can #2 on top of the cheese layer.


Then cover the cheese with the rest of the noodles.


Cover the noodles with the remaining sauce.


As done previously, toss the noodles in the sauce.  For this layer of noodles you especially want to make sure that there aren't any unsauced noodles remaining.  That's right, I made up a word: unsauced.

Live with it.

If you have noodles that are unsauced they tend to not cook very well and become so hard that I'm sure they could be considered a lethal weapon....for your teeth that is.


Cover the saucy noodles with the remaining cheese.


Set the crock-pot to LOW for four hours.  Walk away and enjoy your life.

Or, set the crock-pot to HIGH for two hours.  Again, walk away and enjoy your life.  Watch a movie, write a poem, go for a walk.

Or blog.


I'm sorry, I'm not sure there is anything more beautiful than cheese, sauce, and noodles.

If there is, don't tell me.  I don't want to spoil this moment.


If serving to a large crowd, make sure you get one of the first servings.  That way you can get the best cheese choice possible.  The beauty of this recipe is that the biggest glob pictured here was the cheese sitting on top.  But, the middle layer of cheese is seen in the background.  That middle layer melted nicely into the bottom layer of noodles creating a mixture no man or woman could do on their on.

But the crock-pot set on LOW for four hours could do it magically.