Showing posts with label garlic. Show all posts

Tuesday, October 21, 2014

Recipe #3: Penne Alla Betsy

Recipe: Penne Alla Betsy
Source: The Pioneer Woman Cooks
Time: 45 minutes*
Ease: 4
Taste: 6
Leftover Value: 6
Down the Drain or Keep in the Strainer: Keep it in the Strainer!

*The Food Network recipe says that it will take 1 hr 5 min, however I did not find it took that long.**
**Note: Some of the Food Network measurements differ from the original recipe in the book.

IMG_0400

I am going to make a confession to you.

Before the year 2013, I had never cooked any kind of seafood.  Not even fish sticks.

It wasn't just an, "Oh, I've never made that before," type of thing either.

It was a, "Run away from it like the plague!" type thing.

If I wanted salmon, Hubby cooked it.  If I wanted scallops, Hubby cooked them.

And...that was the extent of the seafood we enjoyed here in our home.

I blame the fact that fish sticks were the only kind of seafood my mother ever served my brothers and me during our childhood.

I slowly tried to get myself into cooking seafood.  I started with salmon, and tended to dry the poor suckers out in attempt to make sure I was actually cooking them right.  Then I decided to just grab the bull by the horns, stop making excuses, and start making a better effort to incorporate a seafood meal every so often into my mix.

Thank goodness I did, or I would have had some difficulty with this one.

In all the time I've had my The Pioneer Woman Cooks book, I have avoided this recipe simply because it had shrimp in it.

What a fool I've been.

IMG_0373

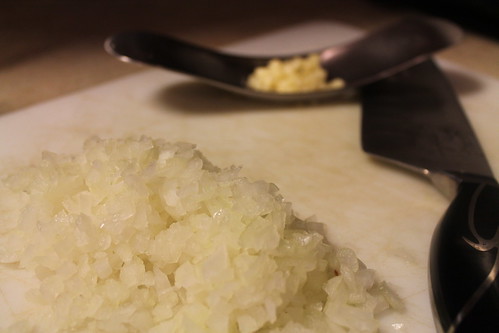
The recipe is fairly simple, so long as you can dice and don't mind cooking seafood.  

Check, and, finally, check.

IMG_0376

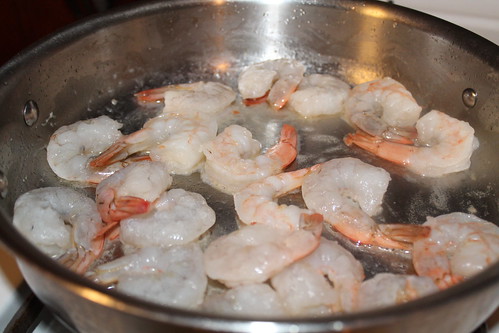
I was surprised how quickly shrimp cooks.  It is far shorter than the time it takes to cook chicken.

IMG_0379

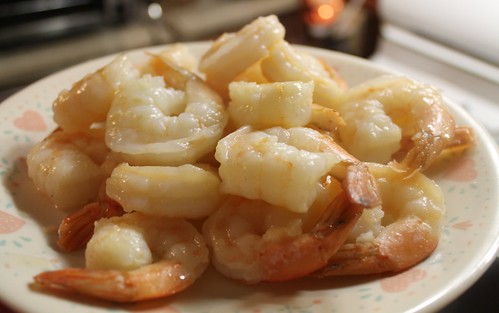
Once the shrimp are cooked, they are set to the side while the sauce is created.  This is the only thing I hate, because it means I have to dirty another dish.  However, the shrimp are going to be chopped up into medium-sized pieces* so I suppose dirtying a dish was inevitable.

*I loved that the shrimp weren't just thrown back into the pan and were instead chopped up for this meal.

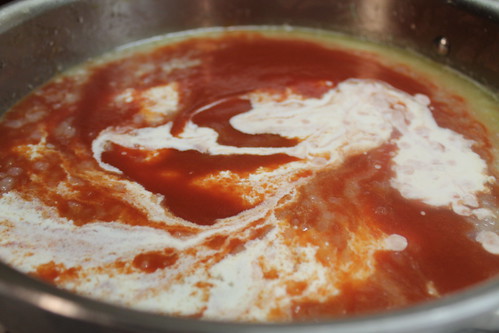
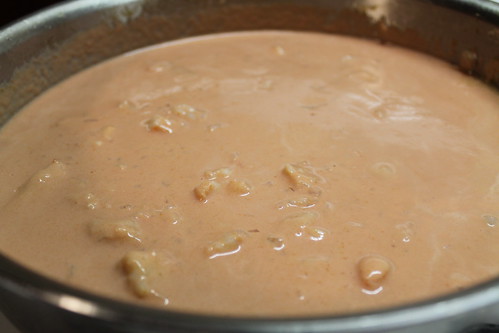
The onions and garlic are fried in oil, then this beautiful portrait is painted:

IMG_0383


Oh heavy cream, how I love and hate you at the same time.

IMG_0386

Once the tomato and cream mixture is stirred, the chunks of shrimp are tossed in.

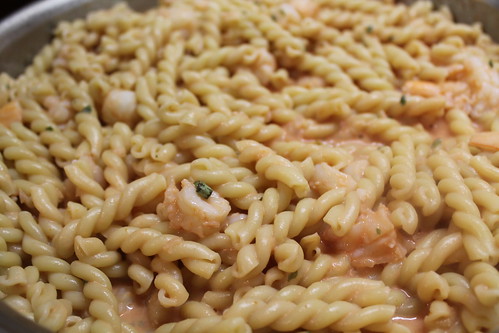
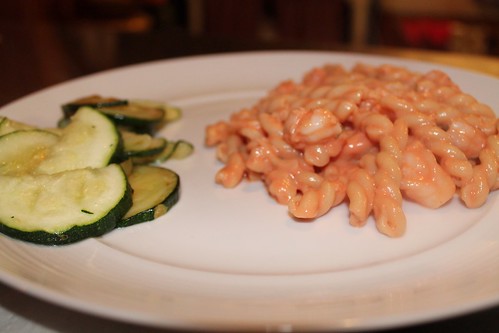
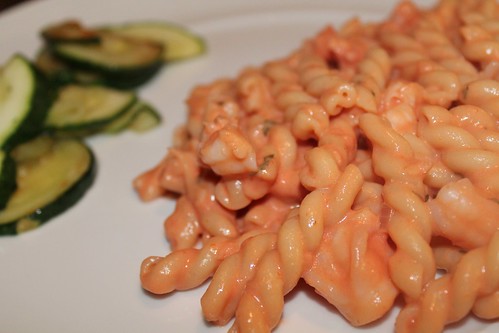
Here was the first point in this challenge that I had to pull my pasta substitution.  I thought for certain that I had a few boxes of penne, but apparently, I was wrong.  Instead I used these cool cavatappi noodles that I can never resist buying.  I'm going to assume they didn't change the integrity of this meal one bit.

IMG_0387

The sauce was rather thin, and Pioneer Woman didn't recommend this, but after tasting a little I decided to let it simmer for a few minutes to thicken the sauce.  Either way, it's delicious!

The only addition I might make in the future is to add a little more garlic and some Parmesan cheese.

IMG_0393

Thursday, July 10, 2014

Sauteed Pork Tenderloin Medallions with Lemon-Garlic Sauce

Recipe: Sauteed Pork Tenderloin Medallions with Lemon-Garlic Sauce
Time: 20 minutes
Ease: 2
Taste: 7
Leftover Value: No leftovers!
Down the Drain or Keep in the Strainer: Keep it in the Strainer!

If you are anything like me, you've begun to face the summer refusal towards cooking dinner.  There always seems to come a point during the summer, usually after we've had a straight week of almost 100-degree days (oh wait, that was the start of summer until now), that something within me rebels against the notion of cooking dinner.  The thought of standing closer than ten feet to a hot stove makes me want to gag and so I revolt and refuse to cook anything more complicated than a half hour of my time.

It hasn't helped that we were spoiled by a trip to Vegas for the first week of summer, and then the second week Hubby was away for business so I barely cooked because it was just me.  This led to an extremely early start to the lack of excitement over cooking dinner.

If you're anything like me, you'll love this following meal because it is a 20-minute meal with hardly any prep and minimal clean up.

IMG_8678

This recipe was one of those ad recipes for 'Pork: Be Inspired'.  I try not to wrinkle my nose too quickly to ad recipes because occasionally there are some winners.  

However, there are many, many losers.

I put off making this recipe for a while because of that reason.  I ended up making it on a night that I didn't realize Hubby was already headed home from work and I was slowly turning into my alter-ego: 'Jessica B' who has blood shot eyes, frizzy hair, a growl in her stomach, and the inability to perceive right from wrong.

So I was sure this recipe was going to stink and that it would be 9:00 pm before Jessica B disappeared and I was make to my normal self.

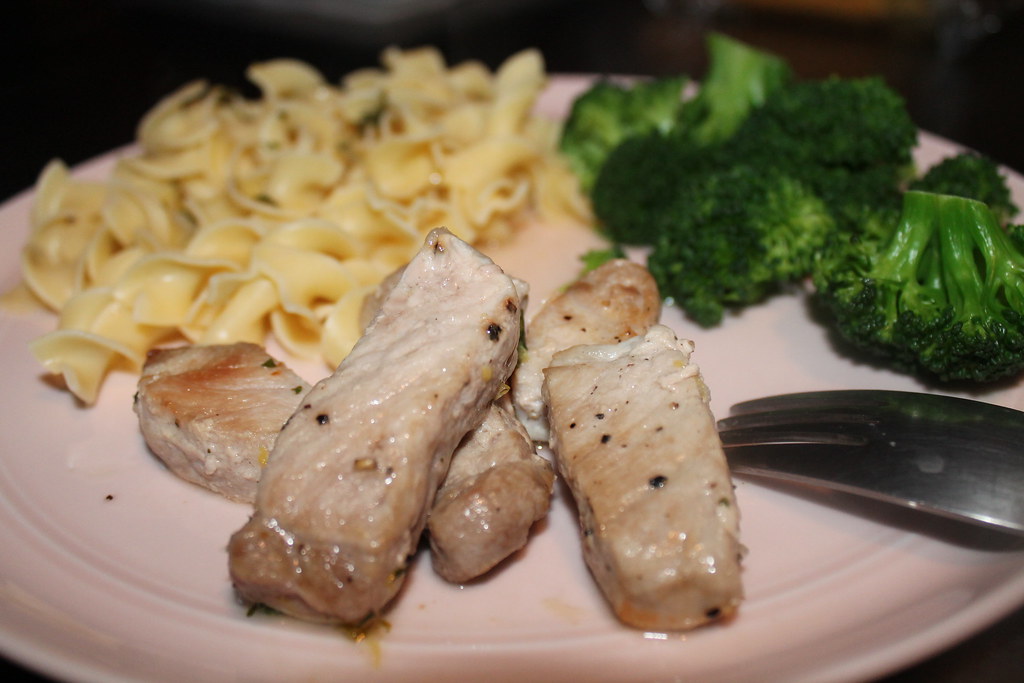
I only had pork chops on hand, rather than a pork tenderloin as the recipe calls for, but I made it work.  I sliced my pork chops into strips, seasoned them, then browned them in the skillet.

The sauce that follows is ridiculously easy and so delicious.  If only everyday life could be as simple and satisfying as white wine, chicken broth, garlic, and lemons. 

IMG_8687

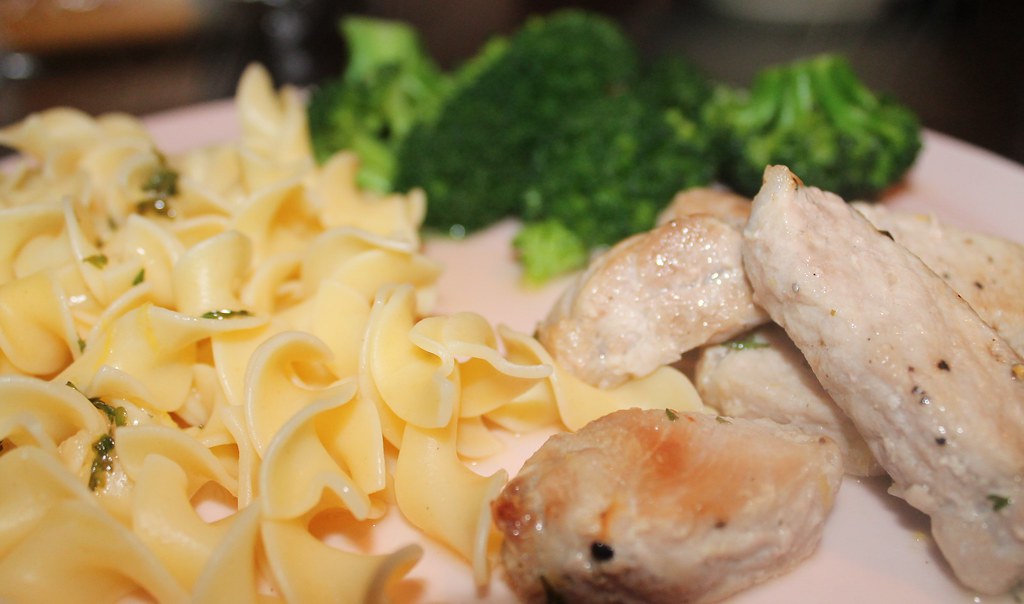
I served mine with egg noodles and broccoli and I highly recommend that you do too.  The lemony garlic sauce poured over the noodles is addicting. 

Sunday, October 13, 2013

Mac and Cheese That Is...wait for it...Healthy?!

Recipe: Healthy Mac and Cheese, with a twist
Source: Fitness Magazine
Time: 1 hour
Ease: 4
Taste: 9
Leftover Value: 9
Down the Drain or Keep in the Strainer: Keep it in the Strainer!

I have made a lot of mac and cheese in my days as a wife, and even before that during my days as a college student.  Of course, it has not always been homemade.  In college, I thought nothing less of myself than to serve up mac and cheese from a box.  Today when I reach for that box of mac and cheese I always think, "You can do so much better".

Here's the catch.  Here's the reason that keeps me serving up boxed mac and cheese when it's 6:55 pm and I haven't started dinner yet and Hubby will be home in 20 minutes: Hubby loves boxed mac and cheese.  In fact, he constantly tells me that if he came home to hot dogs and boxed mac and cheese once a week for dinner, he would love it just as much as the semi-gourmet variety that I try to constantly set before him.

Hot dogs and mac and cheese...once a week?

My skin crawls at the thought.  It's almost as bad a thought as having a 'leftover night'.

I'm a snob, I know.  The first step to dealing with your issues is admittance, right?

The even stranger thing in this wacky world of mac and cheese is that any mac and cheese I have made without the box, Hubby has still preferred the box.  I was slightly offended, especially after I had made my slow cooker mac and cheese for Thanksgiving and my entire family tasted it then held hands and sang a song of thanks to the heavens for the deliciousness that was my mac and cheese.

Instead of sticking with this mac and cheese which all the normal people in the world said was perfection, I continued to seek out a homemade mac and cheese that would cause Hubby to resound my praises far and near.

I almost thought it couldn't be done.  Until we started this healthy kick to lose weight (20 pounds and counting...) and I scoured the internet for healthy mac and cheese recipes.

The secret to this delicious mac and cheese is Rocco's Secret Weapon.  Ordinary mac and cheese involves a lot of milk and sometimes, butter.  When flour is added to this it makes what is known as a Bechamel sauce  This adds texture to mac and cheese, but unfortunately with the additive of a lot of fat.

By the way, not to be a hypocrite or anything, I love fat.  I just don't love what it does to my thighs.

This puree is weird, it's smelly, but it works.

Cut up an onion, 9 cloves of garlic (ordinarily I use minced garlic because I always have that on hand), and 1/2 cup of water.  Place in a microwave safe bowl.


Here is where it gets a little strange, but I promise, well worth it.

Cover the bowl with plastic wrap and microwave for 10 minutes.


I never let mine go the total 10 minutes because of what starts to happen to the plastic wrap.

After it is done cooking in the microwave it should look something like this:


Next, blend it all together.  You can use whatever kitchen machinery you prefer to do this.  My preference is my immersion blender.

I absolutely love my immersion blender.  My life is complete now because of it.  I make the most delicious mashed potatoes with it, the smoothest smoothies, and this fabulous onion-garlic puree.


I'm planning to do a giveaway eventually of an immersion blender.  That's how much I love them.  Every kitchen in America should have one.


The onion-garlic puree can be made ahead of time and refrigerated.  I never do this, but I should because for as much as I love it, it is quite a process mixed in with the other steps of this recipe.

Start the recipe by boiling water.  This next step I added.  I recognize that it makes this 'healthy' mac and cheese a little less 'healthy' in a health nut's standards, but for me it makes it perfect (and without adding too many extra calories).

Fry some bacon.  I try to only fry four to six pieces.  Four for the mac and cheese, and two for me to nibble on.


Bacon.  The soul reason I could never be a vegetarian.


I ask you, is there a more enticing sight?

The answer is no.


If you're trying to be outrageously healthy, use whole wheat pasta.  I tend to hate whole wheat pasta because it tastes like cardboard rather than the glorious complex carbohydrate that it should be.

So sometimes I'll use the good stuff that wasn't too unhealthy in my grandma's day.

After the pasta is done cooking, using the same pot that the pasta was cooked in (because it's all about less dishes at the end of the night, right?) simmer the onion-garlic puree with 1/2 tsp of dry mustard and a pinch of cayenne pepper.


Once combined, add one cup of shredded cheddar.  Wait a minute, this is healthy mac and cheese and all so make sure it is reduced-fat cheddar.

But I won't tell if you let some of the good stuff slip in though.

It'll be our secret.


When the consistency looks like this:


remove the pot from the heat.  Whisk in 1/3 cup of nonfat yogurt.

The recipe says to use the 'Greek' stuff, but any ole nonfat yogurt will work.


Once the sauce has reached a smooth consistency, toss the macaroni into the pot with the sauce.

*Note: If you've noticed that my pot changed, you would be right.  It has taken me several makings of this recipe to finally have pictures for the most important steps.  I wouldn't be able to sleep at night if I left out the mixing of yogurt and cheese.  You understand, I'm sure.


Mix the macaroni and the sauce together until the macaroni is well coated.


You have two choices of what to do with your bacon.  What I do completely depends on my mood.  Sometimes, I'll mix it in with the macaroni and cheese.  Other times, I will pour half of the mac and cheese into the dish, top it with half of the bacon, then repeat.


Either way it will all flow together into a beautiful combination kissed from the angels in heaven above.

Pour the mixture into a baking dish that you already sprayed with nonstick cooking spray.  (See again, healthy.  Most mac and cheese recipes will tell you to rub the dish down with, gasp, butter!)

Again, let me reiterate, butter is my friend.

I love butter.


Sprinkle a handful of Panko crumbs over the top, if you're into that sort of thing.  I find that it adds the perfect subtle crunch to the final product.


Then, sprinkle 1/4 cup of grated Parmesan cheese.  I highly recommend using freshly grated Parmesan.  It is incredible.  Please, promise me you won't use the stuff that Kraft has pre-grated for you.  It is not the same.

P.S.  There is a time and place for everything.  I love my grated Parmesan cheese, but it does not belong on top of my mac and cheese.


Bake for 10-15 minutes at 425.

Oh my goodness.  It is the baked ziti of mac and cheeses!


This recipe makes four servings, a serving weighs in at 438 calories.  Put a little greens on your plate and you can feel content that you've eaten dinner for under 500 calories.

That is, so long as you only have one serving.


Which, tonight, I found it extremely hard to do.

Monday, July 1, 2013

Gram's Magazine, Mom's Asparagus, and My Empty Fridge

Recipe: Brown Butter Tortellini with Toasted Garlic and Asparagus
Source: Woman's Day Magazine
http://www.womansday.com/recipefinder/brown-butter-tortellini-toasted-garlic-asparagus-recipe-wdy0513
Time: 25 minutes
Ease: 3
Taste: 8
Leftover Value: No leftovers, but I would imagine they are fabulous.  Perhaps even try them cold?
Down the Drain or Keep in the Strainer: Keep it in the Strainer (said Hubby!)

Every month, my grandmother saves her Woman's Day Magazine for me.  She started this after she realized there were occasional contests held, starting with a random one which involved writing.  She said to me, "The clothing in there (the magazine) is corny, but you should enter the contests!  And they have yummy recipes in there too."

I am a magazine fiend, so it didn't take much convincing.  I have, sadly, had to give up some of my subscriptions because I just didn't have the time to get to them each month.  Whenever I do get the chance to veg out and leaf through magazines filled with recipes, house decorating tips, clothing combinations, and organizational strategies, I'm in heaven.

Last summer, in Woman's Day Magazine I found a fun ice cream recipe that doesn't require an ice cream maker.  That's a bonus for me.  Go here to read about it.

I hadn't tried any real food recipes until recently.  I do this thing where I tear out the recipes from magazines that I'm interested in.  I then let them pile up and either decide I don't really want to make them or I file them in my magazine recipe binder where they sit for a little longer before getting made.  Or thrown away.  It totally depends on my mood and my connection to the picture in the recipe.

My little brother, Jonathan, was over for dinner last Monday.  After flipping through my recipe binder, he found "Brown Butter Tortellini with Toasted Garlic and Asparagus", pointed to it, and gave the affirmative that he wanted to have that for dinner.  I found it to be a bit of a strange choice for him considering he hardly eats veggies, and the picture was chock full of the green of asparagus.

His mind was made up, so that was the recipe we would make.

What I liked about this recipe was that it had a short list of ingredients which did not involve an absurd amount of prepping.

What I did not like what that said ingredients were not items I currently had on hand.

After how easy and delicious this recipe was, I am definitely going to stock up on tortellini.  Hubby is a picky man when it comes to cheese filled noodles.  He does not like cheese raviolis, he does not like manicotti, he does not like stuffed shells.  You can see another reason why I hesitated in making this recipe.

His problem is ricotta.  He does not like ricotta.  He also does not like cottage cheese.

That makes me sad.

When we decided to have tortellini, I noted that they had ricotta in them, but decided Hubby would have to just live with it.


The good news is, I think he liked this recipe even more than I did.  I'm sure I have not brought him to the side of loving ricotta, but at least it is a start.


The next ingredient was lemon.  Note: I did have lemons in my fridge, but they were growing hair and other accessories so I decided to purchase a fresh one.

While the water for the tortellini is boiling, the lemon needs to be stripped of it's zest, then sliced thin.


This is fairly easy.  Once you've stripped the lemon almost bare, chop up the remainder and throw it into a cold pitcher of water.

Only if you're into that kind of thing.


Lay the lemon strips to the side and pull out the next two ingredients: asparagus and garlic.


Ah, both of these items should always be on hand in my house.  Sadly, that was not the case.  I'm thinking I have been slacking on grocery shopping.  Shhhh....don't tell Hubby.


I sliced the asparagus up into thirds.  Now, if you're one of those people that wrinkle your nose up to asparagus, don't knock it unless you've tried it.

I fell in love with asparagus completely by accident.  I was twelve and my mom and I were out on a mother-daughter-date in Princeton.  The weather was obnoxiously hot.  We had just been walking around the Institute for Advanced Study where my mom had once worked as a secretary.  It was time to eat, and we ran into the first restaurant we saw without thinking twice about what it looked like on the outside.

Our t-shirts and shorts were clearly too simple for this place.  The waiter came over straight backed, prim and propered up, and handed us our very short menus.  The only thing we cared about was the water on our table.  After we had completely emptied our water glasses we began looking over the menu.  There were only five or six items listed, and they were all a mixture of French and English.  I peeked over my menu at my mom, wondering if we were going to stay.  The prices were much higher than we'd ever, ever, spent on a mother-daughter-date.

"What do you want?" she asked.

"Well, the only thing I see here that I like is filet minon," I said with hesitation.  "But, I mean, it costs a lot.  Do you think we should leave?"

My ever classy mom said no, that we were going to stick it out here, so long as there was something on the menu I'd eat.

"What does asparagus taste like?" I asked looking at the side that came with my over priced steak.

"Grass," she answered.

While that still today is my mother's (and most other people's) opinion of asparagus, that day I found a vegetable that I actually loved.


Melt some butter in a skillet.


Toss in your delicious, non-grassy asparagus.


Chop up two cloves of garlic and add it to the skillet.


Sprinkle in a little salt...


and pepper.


After the asparagus and garlic have cooked in the butter for a few minutes, add the lemon zest.


If you've timed your tortellini properly, they should be done boiling about now and be ready to add to the skillet.  If you're an over achiever like me, they have probably been done for about five minutes.  I just ran a little cold water over them to keep them from sticking and let them wait it out in the sink.


Here is an ingredient I didn't have fresh on hand or even in my spice rack.  In fact, I don't think I've ever even seen it before.

Tarragon.

FYI: It smells a lot like black licorice.

FYI: I'm not a fan of black licorice.


Add the tarragon to the skillet.


Then top it off with some fresh Parmesan (finally, something I already had in my fridge!).

At this point, I just let the skillet sit on the stove top for a few extra minutes with the heat on low to melt the cheese.  Then I tossed it around a little before serving.


Here's how yummy this side was, I made it for Jonathan and Hubby on Monday.  Then, I made it again on Wednesday.

The only complaint Hubby had was that there was a little too much lemon flavor.  But if you're into that, like I am, you can just ignore comments like that.