Showing posts with label Pioneer Woman. Show all posts

Saturday, December 13, 2014

Recipe #38: Macaroni and Cheese

Recipe: Macaroni and Cheese
Time: 45 minutes
Ease: 2
Taste: 8
Leftover Value: 8
Down the Drain or Keep in the Strainer: Keep it in the Strainer!

I made PW's mac and cheese before and wrote beside the recipe "Good".  This usually means it is worth trying again, but it wasn't amazing.

My opinion has since changed--now the recipe has "Yum" written beside it.*

You might recall that I am constantly searching for the perfect mac and cheese.  Though I do love Hubby's favorite, it takes a lot of prep that I don't always feel up to.  PW's mac and cheese is the simplest and tastiest mac and cheese I have ever made, and can only be compared to my slow-cooker mac and cheese.**

*I wish I could come up with a higher level of one word descriptions for recipes, but it is what it is.  My favorite is what I write next to a recipe that is a complete flop: "No".

**The difference?  Hubby likes the PW version.

IMG_1422

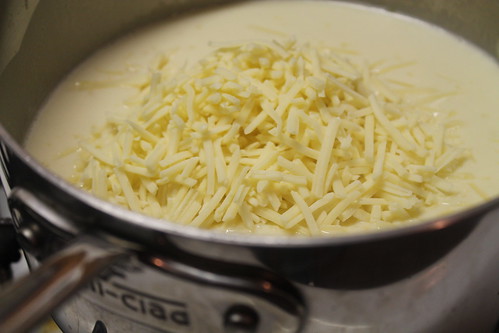
As with most mac and cheeses, we start by creating a roux with butter and flour.  Adding the flour slowly and constantly whisking is the key to a great roux.  Milk is then added in the same fashion.  After a few seasonings and an egg, the main attraction is added.

IMG_1428

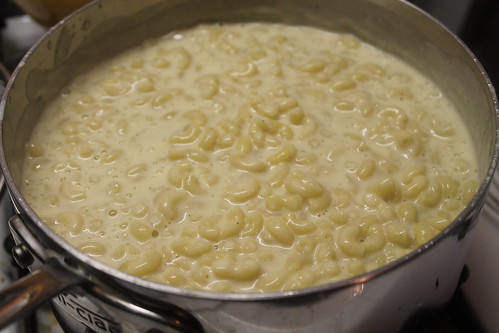
I usually try to make macaroni and cheese happen in as little pots as possible.  If you have a lot of time on your hands this can be done by cooking your pasta first.  While it drains, the cheese sauce can then be made in the same pot the pasta cooked in.

IMG_1435


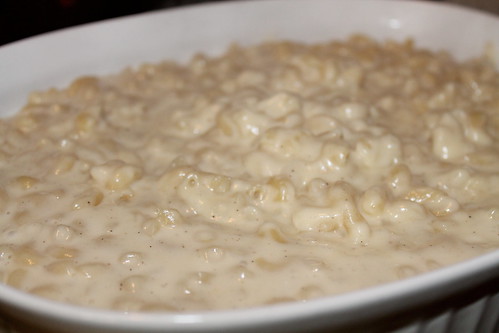
PW says that the macaroni can be served immediately or baked.  I like for it to bake so that the sauce thickens a little more and loses some of that watery consistency that you can see at the bottom of the next picture.

IMG_1441


But you do whatever floats your boat.

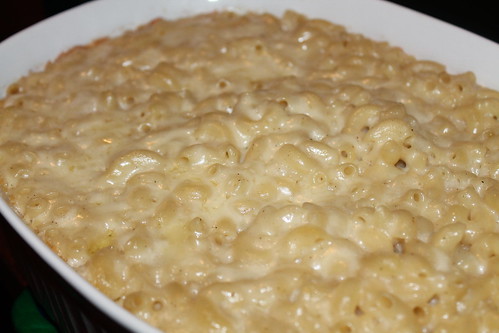
Of course, when you bake the macaroni and cheese you get to add more cheese on top of the macaroni.

And adding more cheese can only be a good thing, right?

IMG_1452

I brought this to a pot luck Bible study I attend and everyone loved it.

It's homemade, quick to make, and tasty.  It's kind of impossible not to love.

Friday, October 24, 2014

Recipe #6: Egg-In-The-Hole

Recipe: Egg-In-The-Hole
Source: The Pioneer Woman Cooks
Time: 5 minutes
Ease: 3
Taste: 10
Leftover Value: Never, ever, any leftovers
Down the Drain or Keep in the Strainer: Keep it in the Strainer!

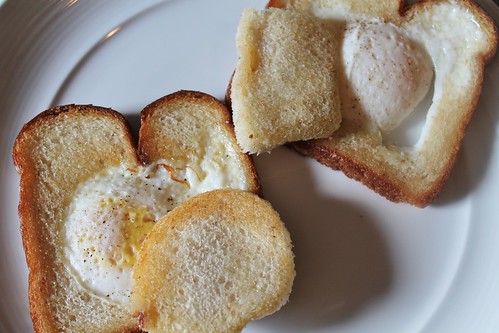
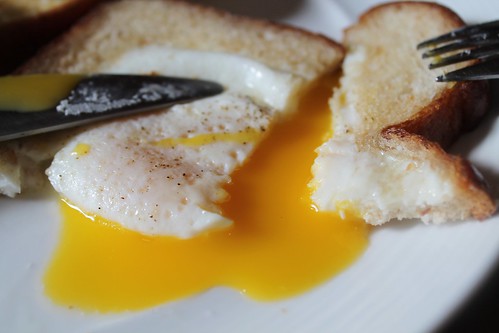
IMG_0468

I have been eating eggs-in-the-hole since I was eight or nine-years-old.  Gram would make them for me for breakfast, lunch, or an afternoon snack--they are so good, honestly, it doesn't matter what time of day you have them.

Only Gram didn't call them egg-in-the-hole.  At first, she called them 'Moonstruck Eggs' because in the movie Moonstruck someone is making them and that inspired Gram to want to make them.  But I guess that name didn't make too much sense to a child, so we began calling them 'Funny Eggs'.

Apparently we aren't the only ones to give this item whatever name we thought suited it.  Pioneer Woman lists off over ten different names given to this delicious way to cook an egg including: frog-in-a-hole and private eyes.  Interesting.

I'll stick with calling them funny eggs, though moonstruck egg does have a classy sound to it.

Being that I've been making funny eggs for as long as I have been cooking, I thought it was rather silly to actually follow a recipe.  But since it was in the book, it was part of the challenge, and I had to do it.

And I'm so glad I did.

I realized, in my recent times of making funny eggs, that I have grown rather impatient with this less than ten-minute meal.  I've wanted to rush through getting my bread perfectly crisp and my eggs still runny, and tried to speed up the process by doing everything from raising the heat to frying the bread first.

But the answer my friends is this: butter.

I know, you didn't want to hear it, but it's the truth.  Butter simply makes everything better.  See, in my impatience, I had also grown a little health conscious and was trying to use a tablespoon or less of butter in making my funny eggs.

Pioneer Woman ruined that by using 3-4 tablespoons per egg and wowing my taste buds at the same time.

IMG_0453
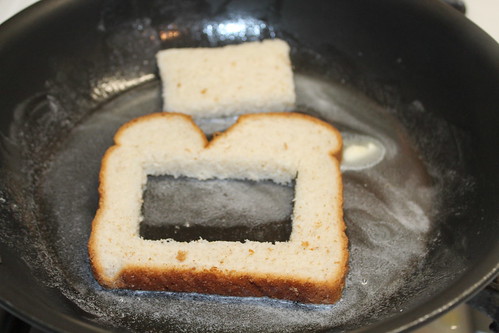
We never used fancy biscuit cutters to make our hole.  A knife works just fine.

Of second importance is timing.  We start by heating 2-3 tablespoons* of butter in a skillet, then placing the bread into the skillet to soak up some of the butter.

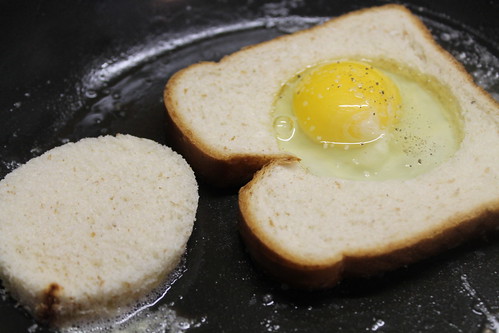
After a minute--a whole entire minute---the egg is then cracked in the center.  She doesn't warn of this, but I've had enough experience with messing up my eggs to know that you need to make sure you crack lightly and carefully break away the shell as to not break the yoke.

*I opted for two.

IMG_0461

Season with salt and pepper!  Yet another thing that I would ordinarily hurry past.  

Why do we insist on living flavorless lives when just a little salt and pepper can change everything?  That is what I asked myself again and again after making this recipe.

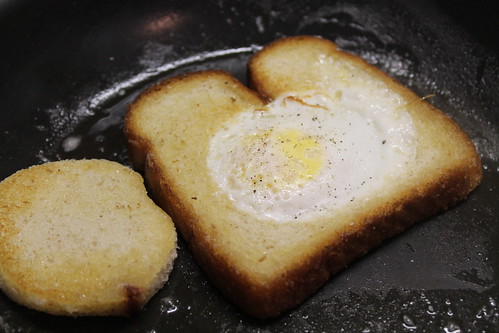
Flipping the egg/bread over is as tricky as making sure to crack the egg properly.  If you wait a full minute, the egg should be set enough that this can be done without breaking it.

IMG_0463

Oh, and before you do this, Pioneer Woman suggests throwing another tablespoon of butter in, 'just for kicks'.

Here are the three elements you want to remember when making funny eggs.  They are what I've learned from following Pioneer Woman's recipe: butter, timing, and a large pan.

I always tried getting by using a small skillet and while it works, a larger one does the job better.

Concerning the butter, when I made my second funny egg I could use far less without compromising the flavor.*

*There was still plenty (butter) left in the pan.

IMG_0472

Hello, gorgeous.

If you don't like your eggs runny, I seriously don't know what is wrong with you.

I'm just kidding.  If you don't like your eggs runny, just let the egg cook longer in the pan on both sides.

But runny is where it's at.

Finally, that little square or circle of bread that you kept in the pan and fried in the butter, it is sacred.  Use it to sop up the egg yoke, or just stuff it in your mouth and enjoy the buttery goodness.

Thursday, March 27, 2014

BologNO Sauce

Recipe: Bolognese Sauce
Source: http://thepioneerwoman.com/cooking/2009/05/ryans-bolognese-sauce/
Time: 1 hour (includes 30 minute cook time)
Ease: 4
Taste: 4
Leftover Value: 2 (I have some in the freezer, so we'll see what that's like when I brave thawing it and using it)
Down the Drain or Keep in the Strainer: Down the Drain!

I hate when a recipe looks so wonderful....

IMG_7599

and turns out to be crap.

I'm sorry to use such strong language here.  

But that's how I felt.

And I'm a girl who says what she feels.*

*It is one of my greatest downfalls.

Usually Pioneer Woman doesn't do me wrong, but this recipe was a major downer to a highly productive snow day stuck inside.  

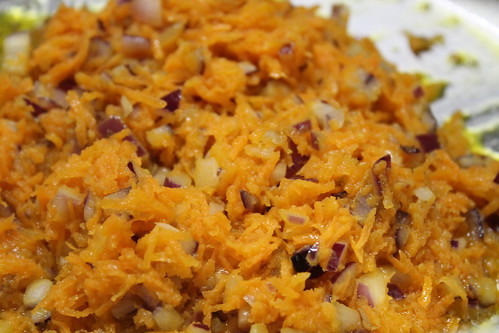
IMG_7573

The beginning step of frying carrots and onions together was pretty much my everyday clothing choice color combination, so I was a little partial to its beauty.

Then I wondered how on earth carrots equated to tomato sauce, but they had worked so well in my tomato soup, that I pushed all doubt aside and trusted them to work for bolognese sauce.*

*This was my first mistake.

Foolish, foolish girl.  I know.

IMG_7586

My second mistake was that I trusted wine to make everything better.  

I thought the technique of making a 'well' for adding ingredients, while picturesque for my bazillion ridiculous shots, was simply a fancy way to add ingredients.  Pretty much any ingredient that was added needed to be added into a well.  Perhaps I will learn one day the importance of such a technique, if there even is one.

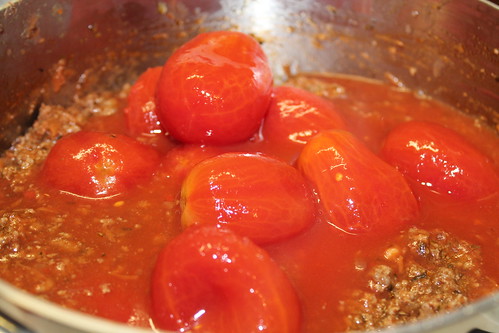
IMG_7588

At the tomato point, I still believed in the dream that was the deliciousness of this recipe.  I still couldn't see how anything containing ground beef + wine + tomatoes could possibly go wrong.

I closed the lid to let the mixture simmer and crossed my fingers, hoping that the magic sauce fairy would transform what I was already sensing to be a down the drain recipe into something indescribably delicious.

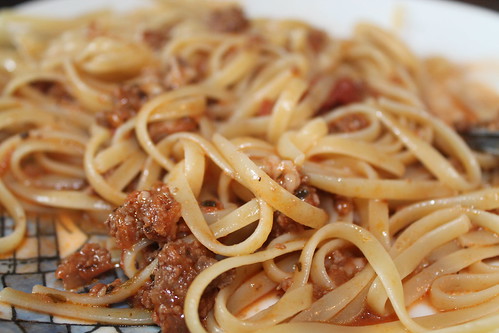
IMG_7594

It certainly wasn't indescribable.  It was, in a word, bland.  It was a lot of effort for a watery sauce which lacked seasoning and that 'wow!' factor that all sauces should hold.

Monday, February 10, 2014

Go Big or Go Home: Gram's Birthday Dinner

As mentioned over at Go Somewhere That's Green, Gram turned 81 yesterday.

Initially, my parents wanted to have a family dinner of store bought fried chicken.  While I love fried chicken, my sister-in-law, Kristina, and I thought we could do better.  Anytime I plan a meal, it can not be simple.  I suppose it's the Italian running through my veins.  It isn't a real meal if the table isn't filled with food, leaving little to no space for things like plates, silverware, glassware, etc.

Here is the menu we planned:

Appetizer: shrimp cocktail, salad, Italian bread

Main Course: fresh lobster, London broil, roast chicken (Surf, Turf, and.....Air!)

Sides: butternut squash with kale, mashed potatoes, broccoli, Red Lobster biscuits

Dessert: strawberry shortcake, chocolate trifle

Kristina was the one who thought to add lobster to the menu.  In fact, it may have been the first suggestion out of her mouth when we began planning.  We made live lobster once before and she desperately wanted the opportunity to be the one to put the lobster into the pot.  For more about this first time experience go here.*

*Looking through my old posts always makes me realize how far my blog has come.  That said, don't judge the poor layout my blog had back then.

We picked up the lobster in the afternoon, then headed to my mom's to cook our feast.

IMG_7479

Gram loves Red Lobster biscuits, so naturally they made the menu.  They are insanely easy to make and taste exactly like the real thing.

Here's the recipe:


Hubby found this awesome parody cookbook of the book Fifty Shades of Grey: Fifty Shades of Chicken.  Not only is it hysterical, the recipes are different from ordinary roaster chicken recipes such as herb roasted chicken which I'm pretty sure everyone on earth has some variation of.  We made the first recipe: plain vanilla chicken. 

IMG_7486

Are you ready for it?

IMG_7487

The spread made of vanilla, brandy, sugar, and butter is rubbed, get this, under the skin of the chicken and then roasted for a little over an hour.

I had planned our menu out by the minute and found that despite the vast number of items we were making, there was a lot of down time.

After the chicken was on, Kristina began chopping veggies for the salad, while I prepared the veggies and herbs for the lobster pot.

IMG_7499

I love the fancy way of chopping cucumber that Kristina recently discovered.  If you haven't tried this before, drag a fork down the sides of the cucumber before slicing.  

My inspiration to make lobster came from the book/movie Julie and Julia.  While I'm sure there are other guides to steaming live lobsters, I find no reason to use anything other than Julia Child's Mastering the Art of French Cooking as my guide.

We didn't want to get too fancy, so I used the steaming portion of the recipe for Lobster Thermidor.  Three cups of white wine, 2 cups of water, with sliced carrot, onion, celery, and seasonings simmers together for about 15 minutes.

IMG_7497

After 15 minutes, the heat is turned up until the water reaches a rapid boil.

IMG_7504

Cooking live lobster is ridiculously easy.  It sounds like something that would be difficult, terrifying, and intimidating, but it couldn't be further from that.

Oh yeah, except for the part where you have to put a LIVE lobster into a pot.

IMG_7512

Kristina did so good, at first.  She picked the lobster up, she held it for a good minute....but then she chickened out.  I'm not sure if it was her conscience speaking to her over the murder she was about to commit or just the thought of plopping that bad boy into a pot of boiling water.*

*Note: Last time, the first lobster I put in the pot jumped.  It was terrifying.

Kristina placed the lobster back down on the shopping bag and I had to grab him, get over the previous terror I had faced, and take care of business.

IMG_7515

I felt like a drill sergeant as I ordered Kristina to get the second lobster into the pot.

IMG_7520

One way or another, she made it happen.

As the lobsters steamed (and no, there are no scary shrills or sounds that come from the pot during the 20 minute steaming time) we prepared the shrimp cocktails.

IMG_7521

I thought about being overly ridiculous and buying the shrimp fresh, but the flash frozen bag of shrimp that was on sale seemed like a better choice, all things considered.

After five minutes of thawing in water, they were ready for assembly.

IMG_7529

IMG_7532

My mashed potatoes were divine, the butternut squash was sweet (the kale a little under cooked--that recipe to come another time), and the chicken was moist, roasted to perfection.

IMG_7534

And this....the London Broil.  There isn't much you can do to a London broil to make it better than it is naturally.  It was probably a little rare for some folks preferences, however, in my house we like it rare so this was a thing of beauty.

IMG_7540

Not bad for 81, right?

IMG_7548

My grandmother loves anything strawberry.  I usually make this Strawberry Shortcake Trifle for her.  However, on my ever growing list of recipes to try was Pioneer Woman's Strawberry Shortcake.  I figured this was the time to do it.

IMG_7552

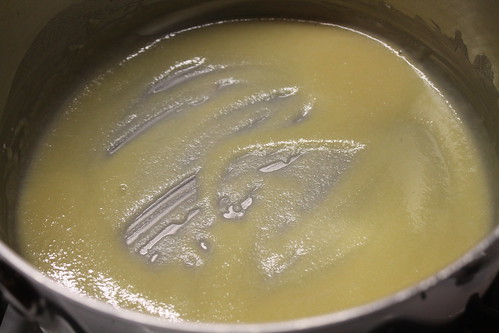
The icing, instead of the typical whipped cream topping that is plopped on ordinary strawberry shortcake, was made of butter, powdered sugar, and cream cheese.  The three of the most sacred things in the world of baking.

It was surprisingly delightful.
IMG_7559

Sunday, December 29, 2013

Homemade Vanilla Extract--It's Easy, I Swear!

Recipe: Homemade Vanilla Extract
Source: Beanilla
Time: 5 minutes, 6-8 weeks of wait time 
Ease: 1
Taste: 10
Leftover Value: 10--It just gets better as time goes on!
Down the Drain or Keep it in the Strainer: Keep it in the Strainer!

If you had told me three years ago that I would love baking so much that I would scour the internet for ingredients not sold in the typical supermarket--I would have argued the ridiculousness of such a notion.  Yet here I am, ordering things like lavender and vanilla beans for recipes that call for such rarities. 

IMG_6315


If you have never used a real live vanilla bean in a recipe, it is well worth the cost and wait of ordering online.  The first time I purchased vanilla beans online was to make Pioneer Woman's Petite Vanilla Bean Scones.  Instantly, I learned that there is no substitute for the beauty and wonder that is a vanilla bean.

I got the idea to make vanilla extract after I received this as a gift:

IMG_6225

While it was an extremely thoughtful gift, at the time, Hubby and I could probably count on one hand how many mixed drinks we'd ever tasted.  We've explored a little since then, but again, only a little.

The picture doesn't do the size of the bottle justice, so to prove that I had a lot of vodka on my hands:  


IMG_6226

I had read on Beanilla.com that vanilla extract involved vodka, and after contemplating how many White Russians (Hubby's drink of choice) that we would have to make to use the entire bottle, I decided I'd use it for vanilla extract.

My goal was to make it for Christmas gifts, so I knew that even with the massive amount I had on hand I would still need a little more.

That's when I realized just how expensive my 1.75 liter bottle of Grey Goose went for:

20131016_202051

And how much the cheapest bottle of vodka in the store went for:

20131016_202131

That's not totally true.  The Canal's brand was cheaper, but also had a lower alcohol percent, so I went for one step above that.  I also decided to make only a few bottles with the Grey Goose, all things considered.

If you choose to do this at home, you do not need to order the "kit" from Beanilla.  I only did because I was making twelve.  If you visit the website, you'll notice that they have updated the packaging on the bottles compared to mine pictured below.  They've also raised the prices.  When I bought mine, the deal was $7.99 a bottle when you purchase twelve bottles or $9.99 for one.  Now it is $11.99 for one and $9.99 if you purchase twelve.  Unless you are making the extract in bulk or for gifts, it would be more cost effective to just order vanilla beans and buy your bottles somewhere else.  

I will admit, I was a little giddy when my bottles and beans arrived in the mail.

IMG_6241

I've always found homemade gifts to be the most meaningful and I knew from the start that I wanted to make this for some of the special women in my life who I knew would not only love the gesture, but also use it up.

It couldn't be simpler, but just in case, they put the instructions right on the bottle.

IMG_6242

For an 8 oz bottle, you need five vanilla beans and one cup of vodka.

IMG_6320

Each bottle was packed with seven beans.  Knowing this, I had planned out a few uses for the extras in my holiday baking.

I love these bottles.

I really, really do.

Sorry.  It's the little things that excite me.

IMG_6321

The first step is to slice the five vanilla beans down the center.*

*Note: Yes, I know there are only four beans pictured here. I promise, I used five.

IMG_6322

Shove the beans into the bottle.  The recipe on Beanilla says that you can cut them up into tootsie roll sized pieces, but that seemed like it would be a drag to deal with later, so I decided against it.

IMG_6325

A funnel is of extreme importance for getting the vodka into the bottle without making a mess....a very expensive and smelly mess.

IMG_6326

Pour one cup of vodka into the bottle.  Considering that the bottle is 8 oz, there is no real need to use a measuring cup rather than just pouring straight from the bottle.  However, I happen to have issues with needing to see things measured out accurately, therefore the measuring cup was used.

IMG_6327

Yet even with the measuring cup, I occasionally had to add more.  The entire bean should be submerged in liquid.  This is important to remind those you are gifting.  The beans can stay in for as long as you want, however, once the liquid level goes below the beans they should be removed.

Every few days, give the bottles a good shake.  This is what mine looked like after about two weeks:

IMG_6334

I'm always excited about giving gifts, but I think I was most excited about this gift.

IMG_6934

There is no comparison between pure vanilla extract and imitation.  Pure always wins.  However, if you're thinking it's much easier to just pick up a bottle of McCormick's Pure Vanilla Extract, keep in mind that what you pay for 2 oz of that stuff is around what it will cost to make 8 oz of your own.

Make it yourself.  Trust me.  You'll thank me.  And anyone you make it for will thank you, too.

IMG_6942


Friday, December 6, 2013

Thanksgiving Delights: Part Four, Cinnamon Rolls

Recipe: Cinnamon Rolls
Source: The Pioneer Woman
Time: 3 hours
Ease: 10
Taste: 10
Leftover Value: 10
Down the Drain or Keep it in the Strainer: Keep it in the Strainer!

I've saved the piece de resistance for last.

Every single time I make these, something seemingly terrible happens and I fear the worst.

Something like, I double the batch instead of halving it.  Or, I forget to let the buns rise before shoving them into the oven.

You do things like this too, right?  Please say you do.

But in the end, they always come out looking like this:

IMG_6661


and all my fears subside.

Before I carry on, I want to take this moment to mention the star of my Thanksgiving breakfast:

IMG_6640


Dear dear butter.  How could we exist without the goodness you add to cakes and pastries?

I'm sure my thighs could still exist, but my heart would have an empty butter shaped hole.

Alright, enough of the sentimental stuff.

These cinnamon buns start out friendly.  The first steps require combining a warm liquid mixture with yeast.  Then, mixing it all together with flour.

A lot of flour.

Hence why I desired to cut the recipe in half a few years ago to no avail.

The dough sits for an hour.  I spend this hour trying to throw together one of my easier Thanksgiving breakfast recipes.  This year I spent this time making the Mini Cherry Pecan Pie 'dough'.

IMG_6657


I always use this pot and I'm always annoyed when after an hour is up I realize I meant to use my larger pot.

The moral of this story is: use a large pot.  And of course, don't be like me.

After the hour, baking powder, baking soda, and salt are sprinkled on top of the mixture.  They are then mixed into the dough along with another cup of flour.*

*Note: You will more than likely need to add even more flour.  I always knead the dough and then think, "Gee, this seems a little moist but I think it will work" and then I'm filled with regret later.

Because the step that follows is going to make your cinnamon rolls even more moist, gooey, and messy.  It's what takes this recipe from fun and friendly to painful agony.

Okay, I'm a little dramatic.  It isn't quite that bad.

IMG_6658


What you're looking at, dear friends, is what I imagine the entryway of heaven must look like.  Golden and delicious.

Alright, I'm not sure about the delicious part, but a girl can dream, can't she?

Because in the recipe she says you can use even more butter for the filling, I use exactly how much the recipe states (because even that seems a bit excessive considering the looks of the above picture).  This is followed by covering the butter with cinnamon and sugar.  The dough is then rolled towards you into one long luscious log of liberty.*

*This makes sense, I promise.

Because I like to give you the cold hard truth here about the recipes I try out, I am going to tell you the mixture of issues I always have at this step.  First of all, my cinnamon rolls always end up oozing buttery pools mixed with cinnamon sugar by the end of the roll.  The next problem is the dough isn't firm.  This doesn't create the perfectly formed cinnamon buns you see in all the Pillsbury commercials.  Instead my buns look like Pillsbury blobs.

Yet, once I assemble my blobs into their pans, bake them, and ice them, they always end up looking like this:

IMG_6664

So for all the faults I have encountered in making these gorgeous globs of goodness, I suppose if they always come out tasting delicious, that's all that matters in the end.